This section will run through how to create a new show and give you the basics to start building your competitive sections.
Creating the Event
1. Go to your Organisation Dashboard and open 'Events'.
2. Click 'Create Event'.
This will bring you up a page which you can work through to input your show information.
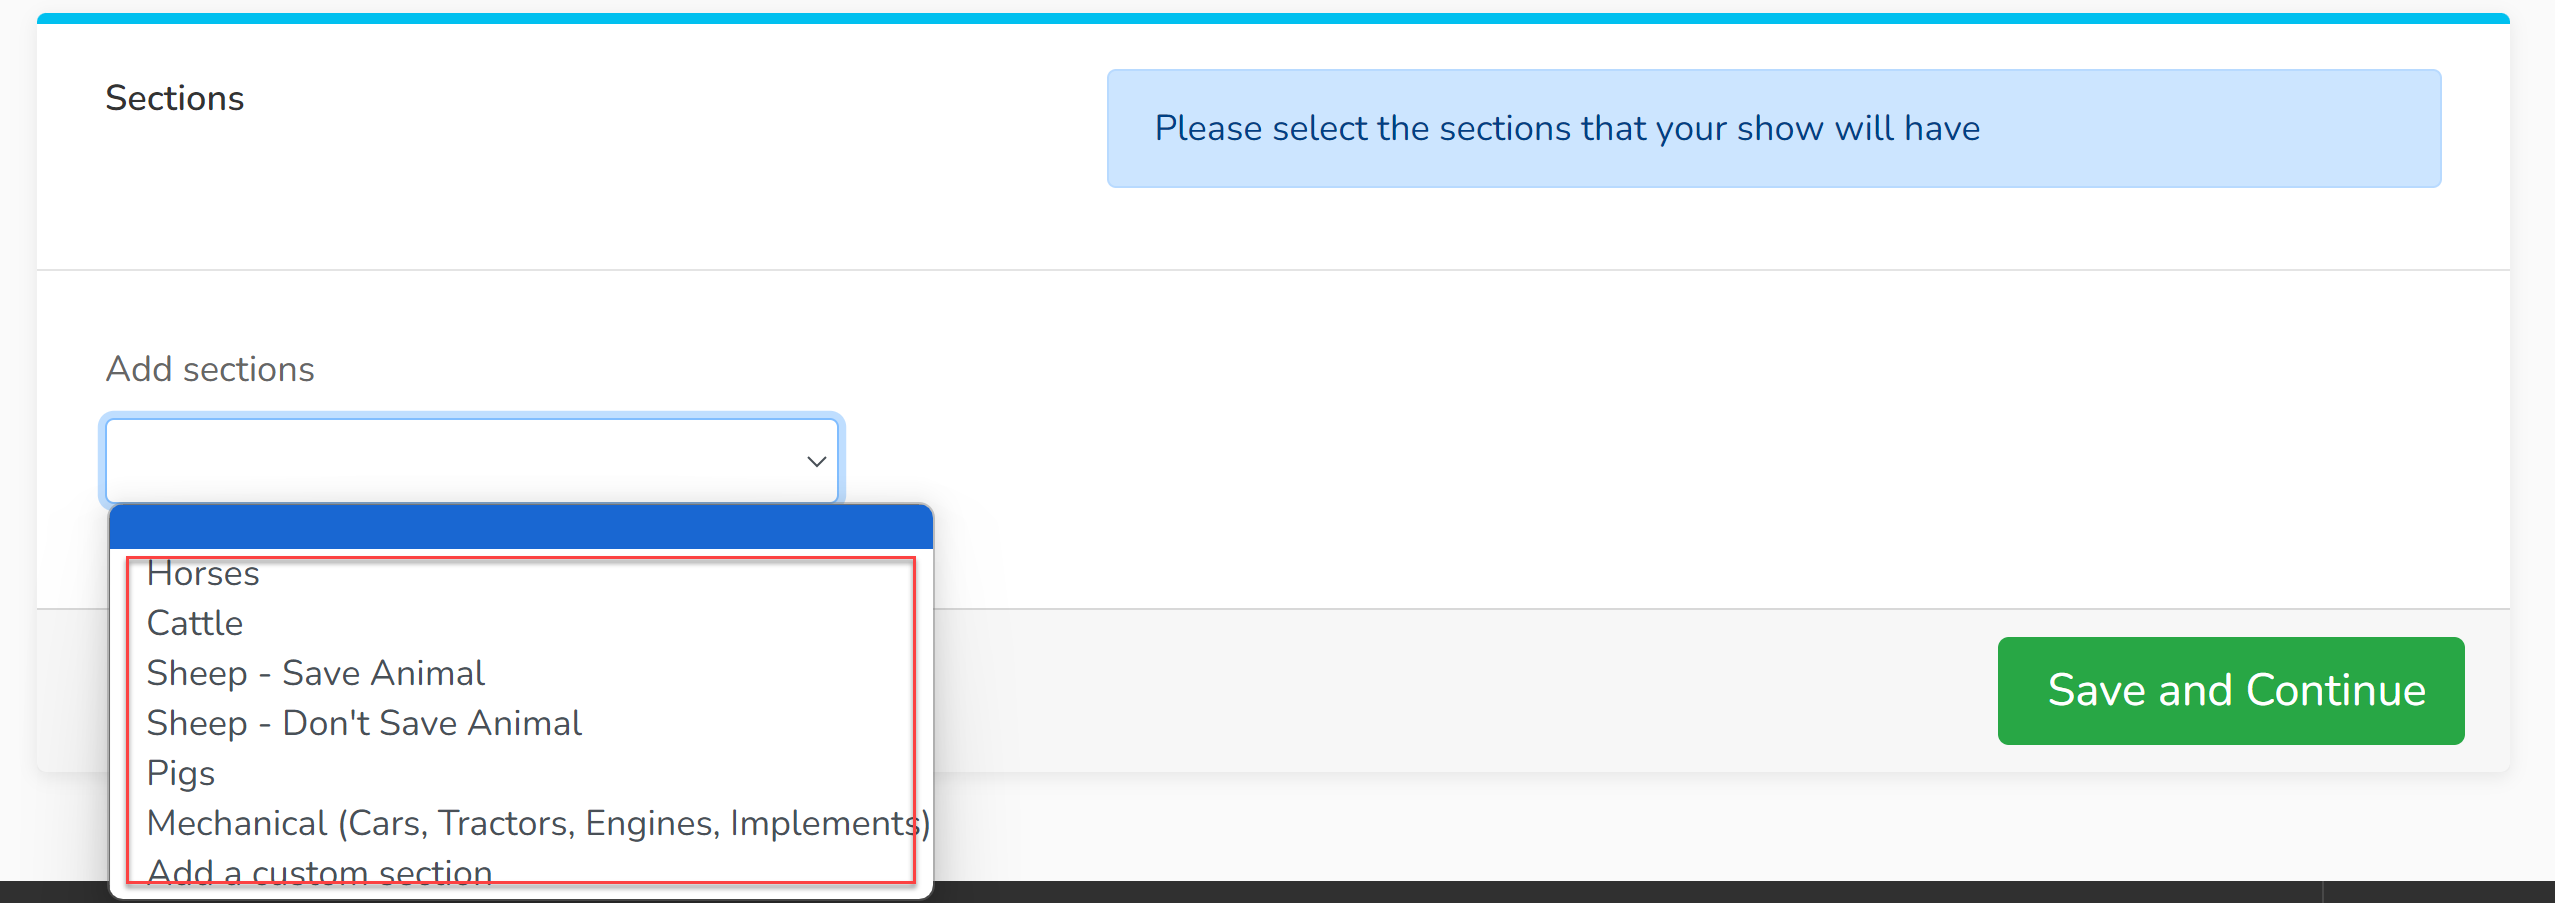
At the bottom is a dropdown menu you can use to select the type of 'sections' you will be hosting. We give exhibitors the opportunity to save data for their exhibits within some sections to save them time in the long run. We need to know how we are saving that data i.e. is the exhibit a horse, a pig or a vintage vehicle? For sheep, you can either gather the individual data for each sheep that is entered (Sheep - Save Animal) or you can ask exhibitors to enter a certain number of animals into a class and they can choose what animals they are bringing to the show in their own time (Sheep - Don't Save Animal).
For any categories that are not listed, such as horticulture or rabbits, please use 'Add a custom section'.
When you click the 'Save and Continue' button your show will be created and will be listed in your 'Events' section as an 'Active Event'.
Section Settings
1. Open the section that you wish to edit. If you only have one section (e.g. horse shows) you can skip this step.
2. Click the 'Edit Details' section and work through each of the options to ensure you have the settings correct for your section.
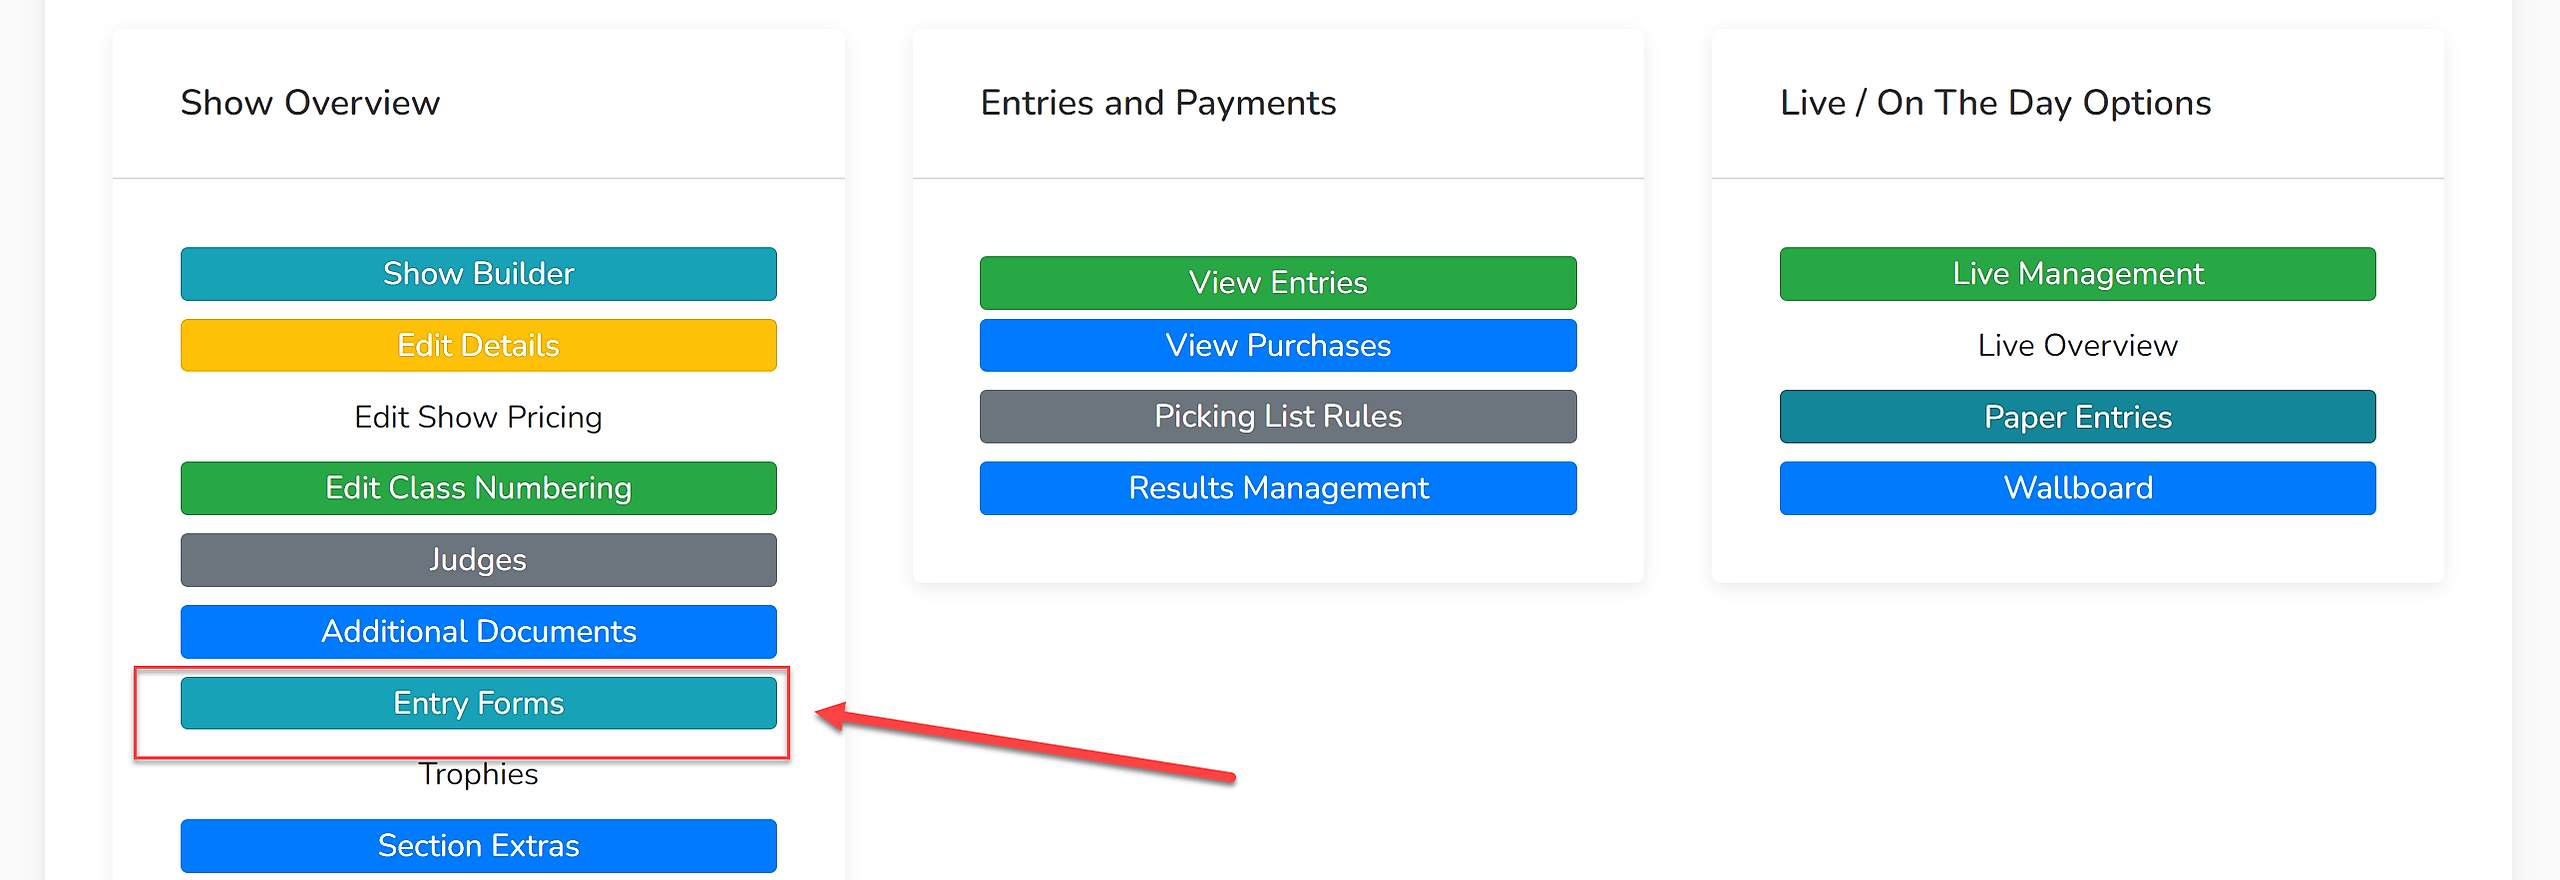
3. Set up your entry forms. You can have as many entry forms as you need.
The 'Your Details' section is the account holder's information. If a user changes this information, they will change their account details on Showing Scene.
How to add a dropdown menu into your entry form
How to create your own custom fields into your entry forms
4. Use 'Show Builder' to build your show.
5. Start by adding your rings - for cattle, sheep, goat and pig sections, you usually just need one ring e.g. 'Cattle Section'.
6. Then you need to build your blocks. These are usually your breeds for cattle and sheep, or your sections for horses e.g. Mountain and Moorland or Pony Breeding.
Entry forms are allocated on a block level as are most of the prices. However, you can change the price of classes in a block later on in the process which is useful for foal classes or pair/group classes. You do need to input some timings, even if they are approximate. These can either be shown to the public or you can hide them (select 'Hide Block Times) in the 'Edit Details' section detailed above.
7. The next step is building your classes. These are the classes that people enter and if you wish to load results into the system following your show, you may also wish to add your championships and special prizes in here. These will not show out to the public to enter so long as you select 'Is this class a championship?' or 'Is this class a 'Special' class?'. If you mark a class as a championship, you will also need to state how many positions will qualify from the feed in classes.
What is the difference between a Championship and a Special?
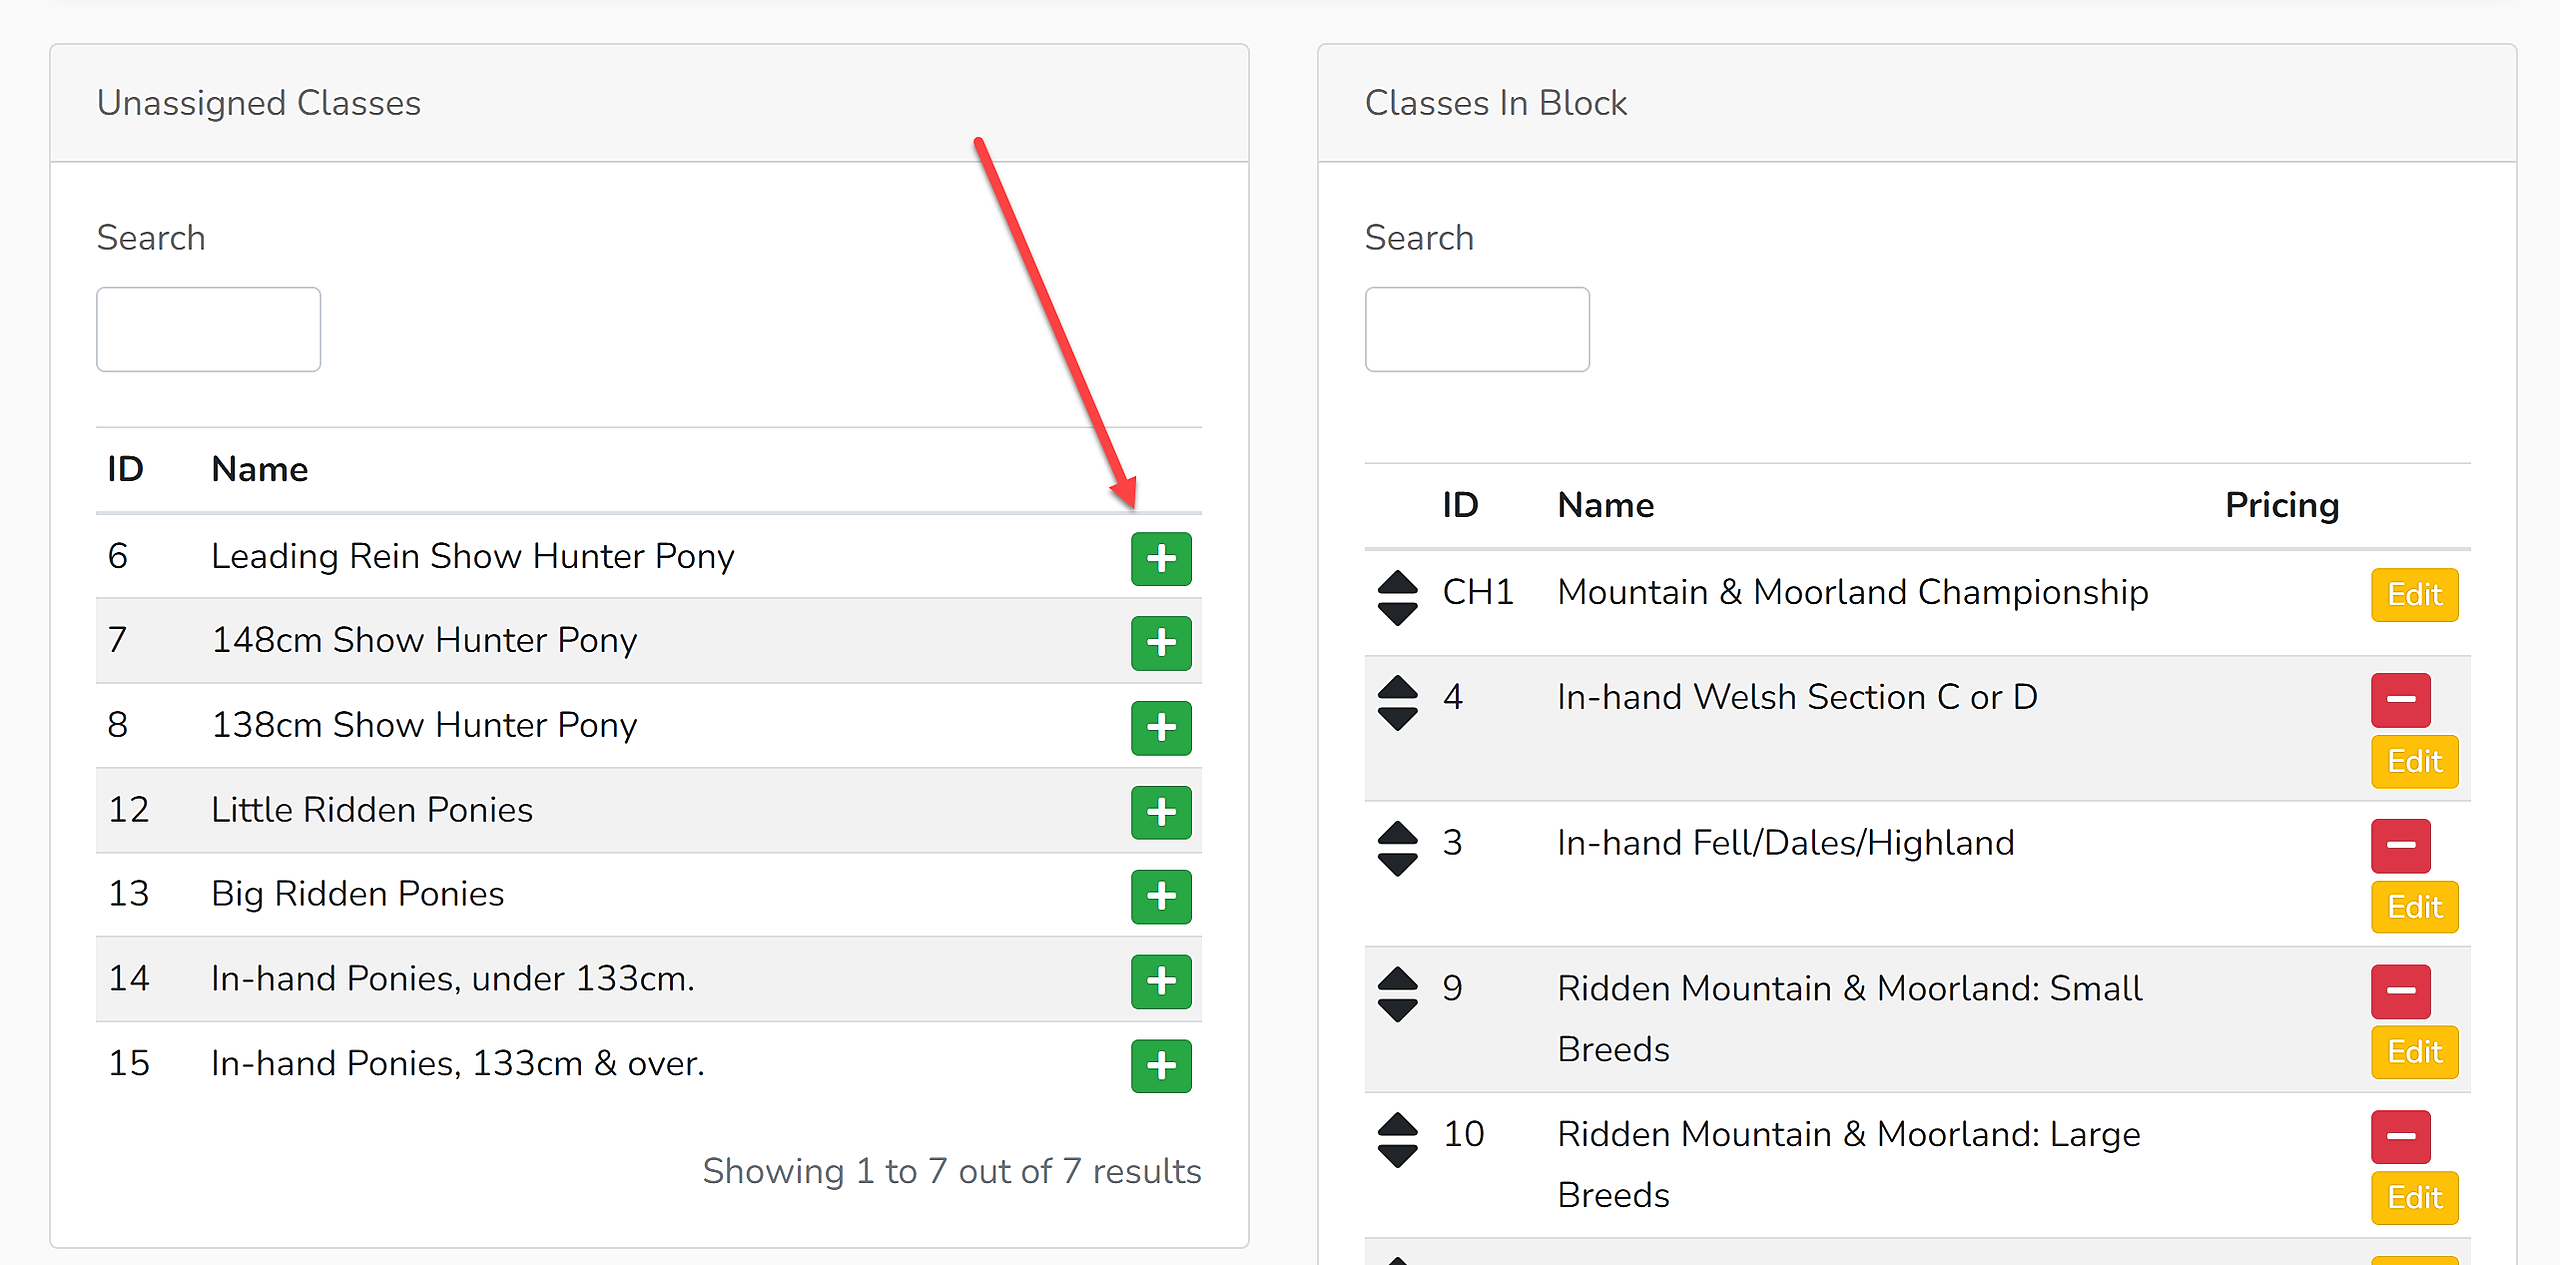
8. Once you have your rings, blocks and classes built, you'll need to load your classes into blocks from the 'Classes to Block' button in your Show Builder.
Select each block and allocate classes into that block using the green plus icon:
As each class is transferred, there will be the option to confirm (or change) the numbering or change the pricing of that individual class if it is different from the others in that block.
9. Once all classes have been allocated to their respective blocks, championships and specials can be set up. If you are not going to be utilising the results feature, championships do not need to be input into the system or set up. First, each championship and special needs to be build in the 'Classes' list and marked as either a special or a championship. Then, the classes that feed into them can be selected from within 'Championships':
In the same way that classes are added to blocks, the classes that feed into the championships need to be allocated. Classes can be pulled from multiple blocks.
10. The final step is to either upload or create your schedule. Click ' Setup Show Schedule' in the Show Builder and select whether the Showing Scene generated PDF is being used or whether the show's own schedule is being uploaded.
11. Once everything has been built, the show is ready to go live. Click the 'Make Show Live' button and follow the instructions.


