Once your trade stands and sponsorships are live and you have shared the links, there may be a wait for enquiries to start coming in.
Viewing Enquiries
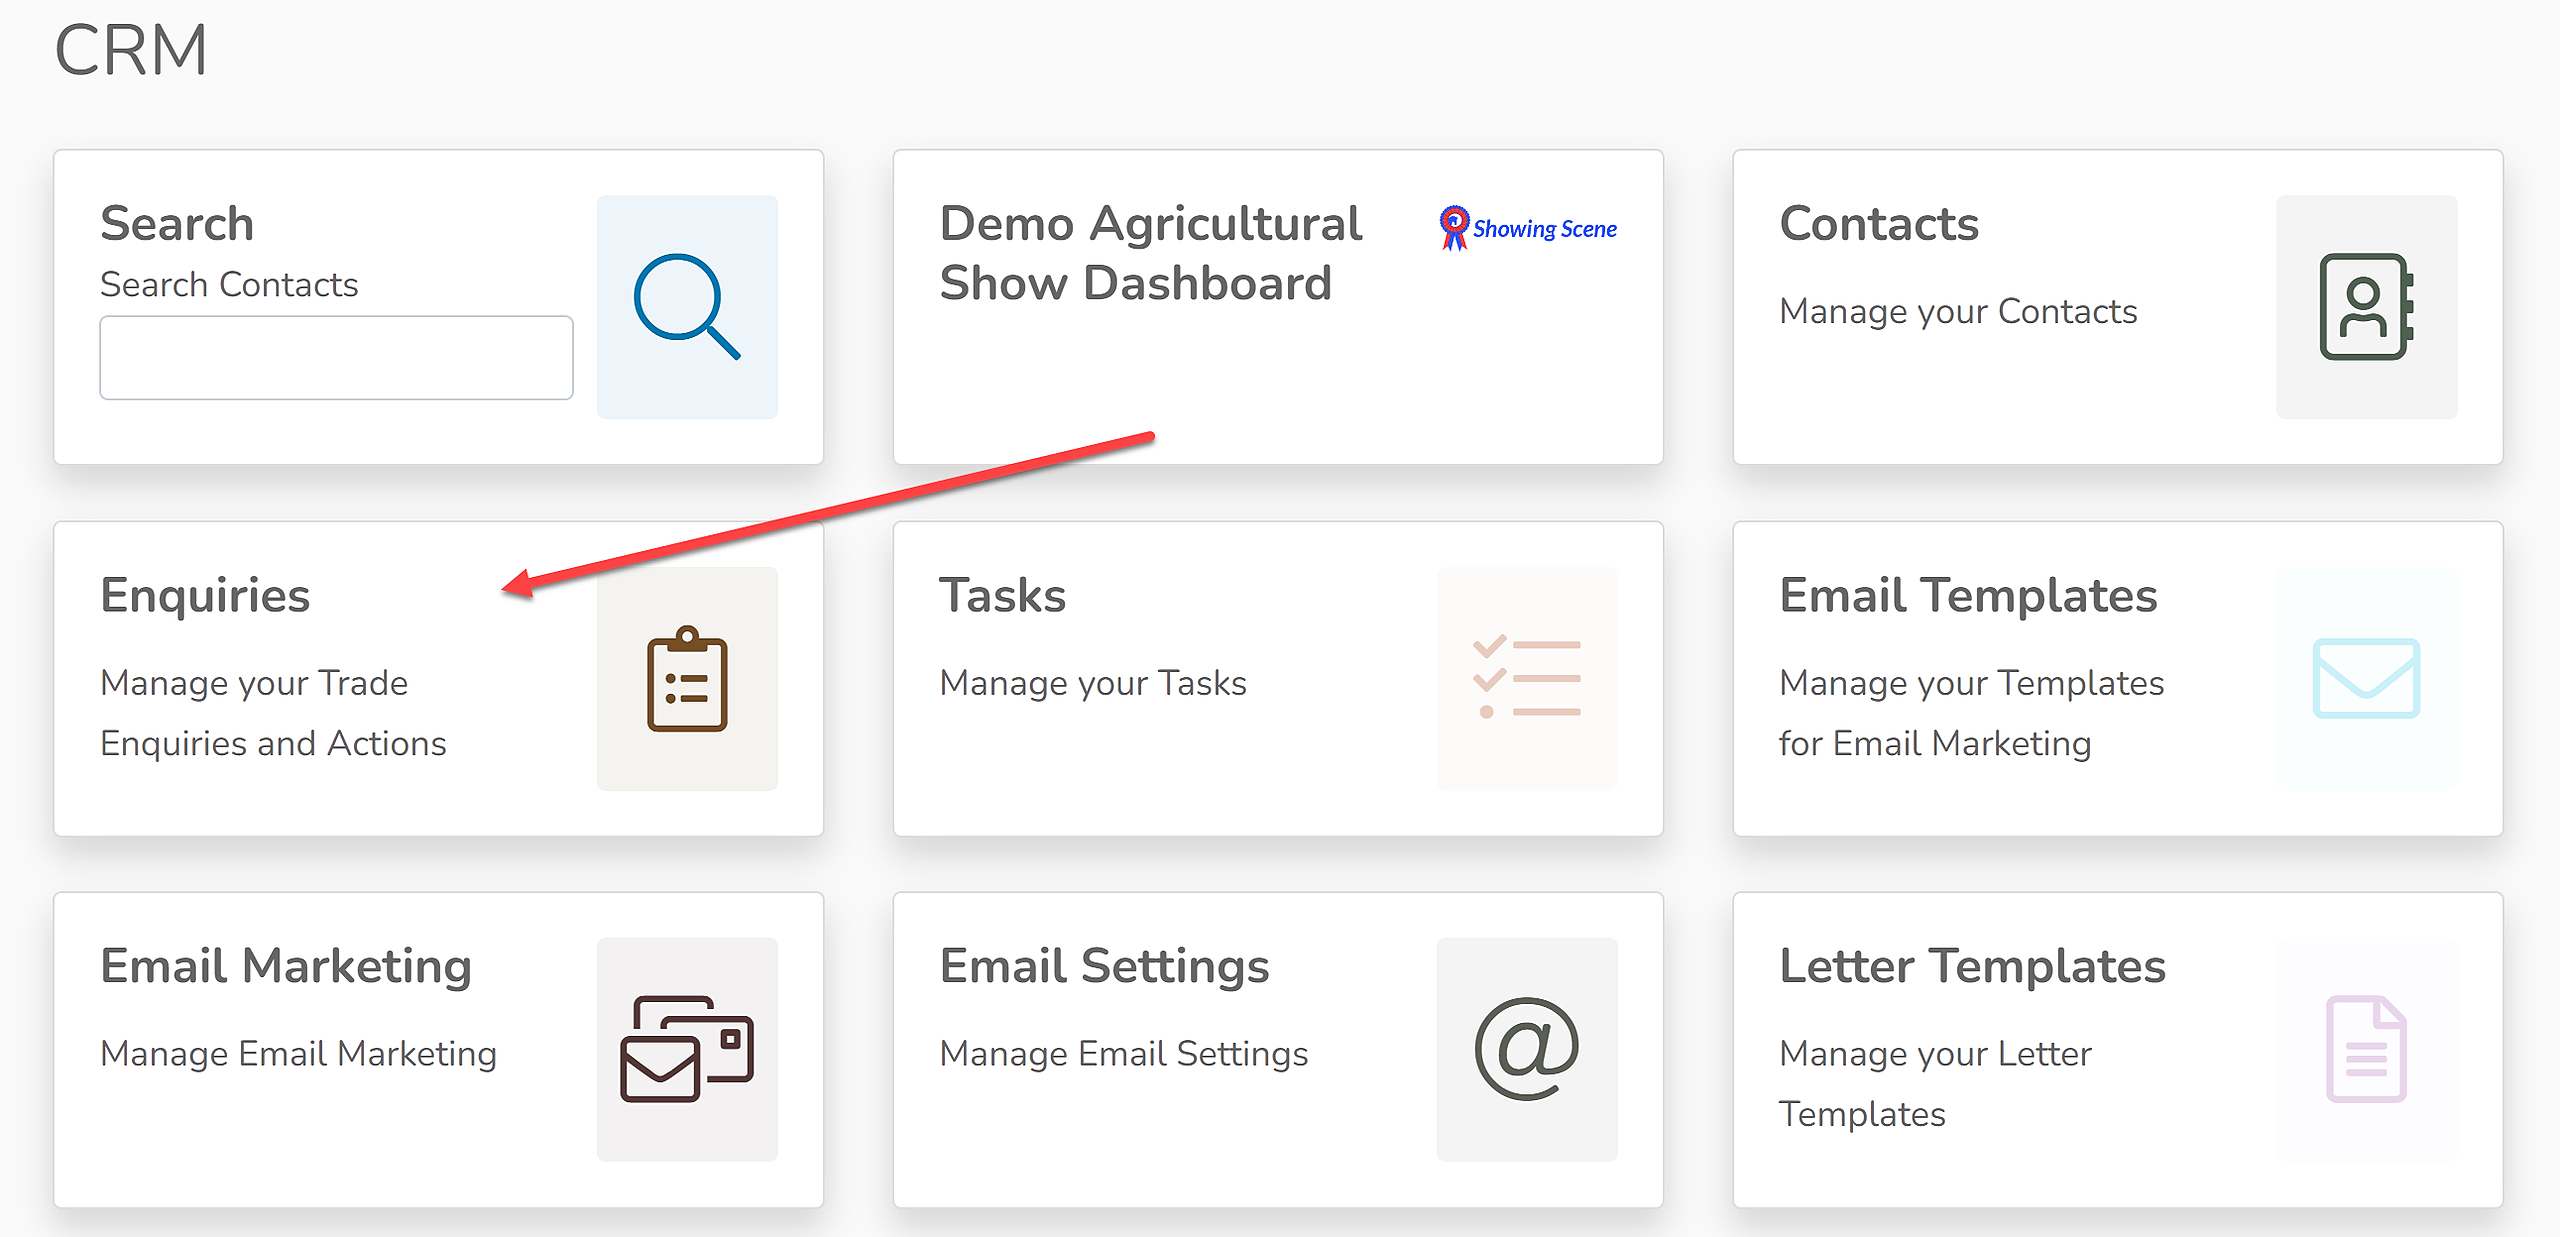
1. To view your enquiries, go to your CRM and click 'Enquiries'.
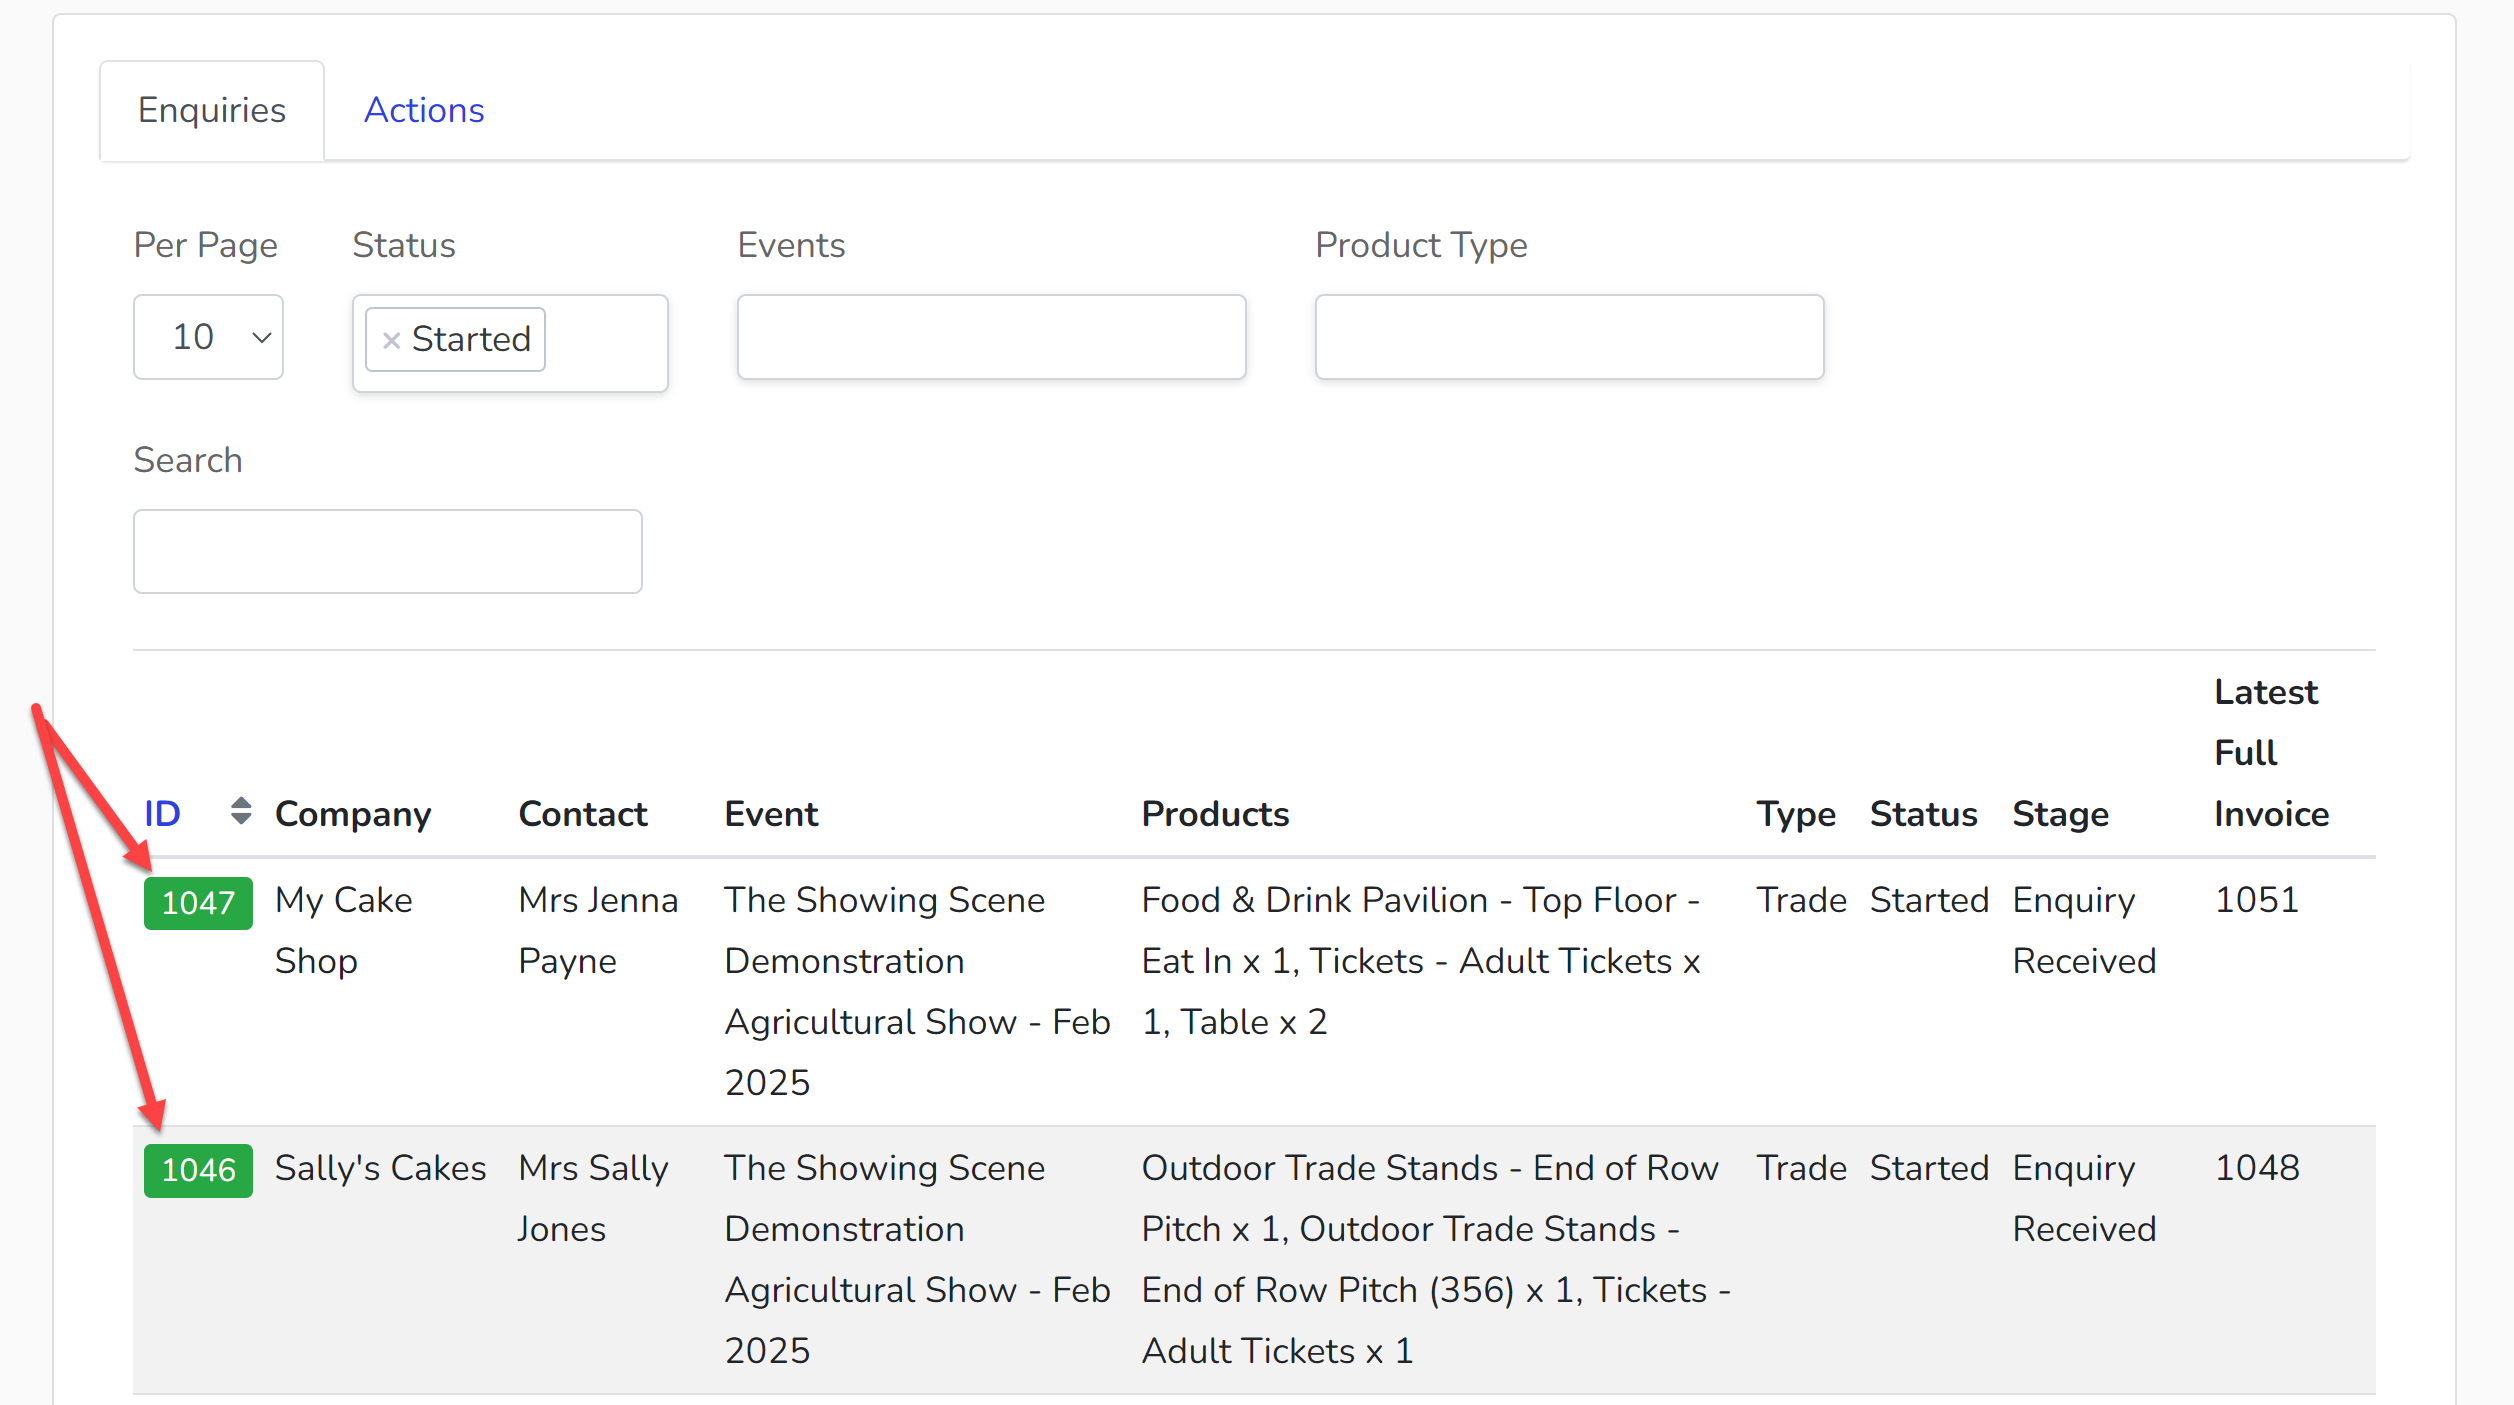
2. If you have received any enquiries, they will show in a list as below. The most recent enquiry will always show at the top of the list. Top open an enquiry, click the green ID number.
Workflows
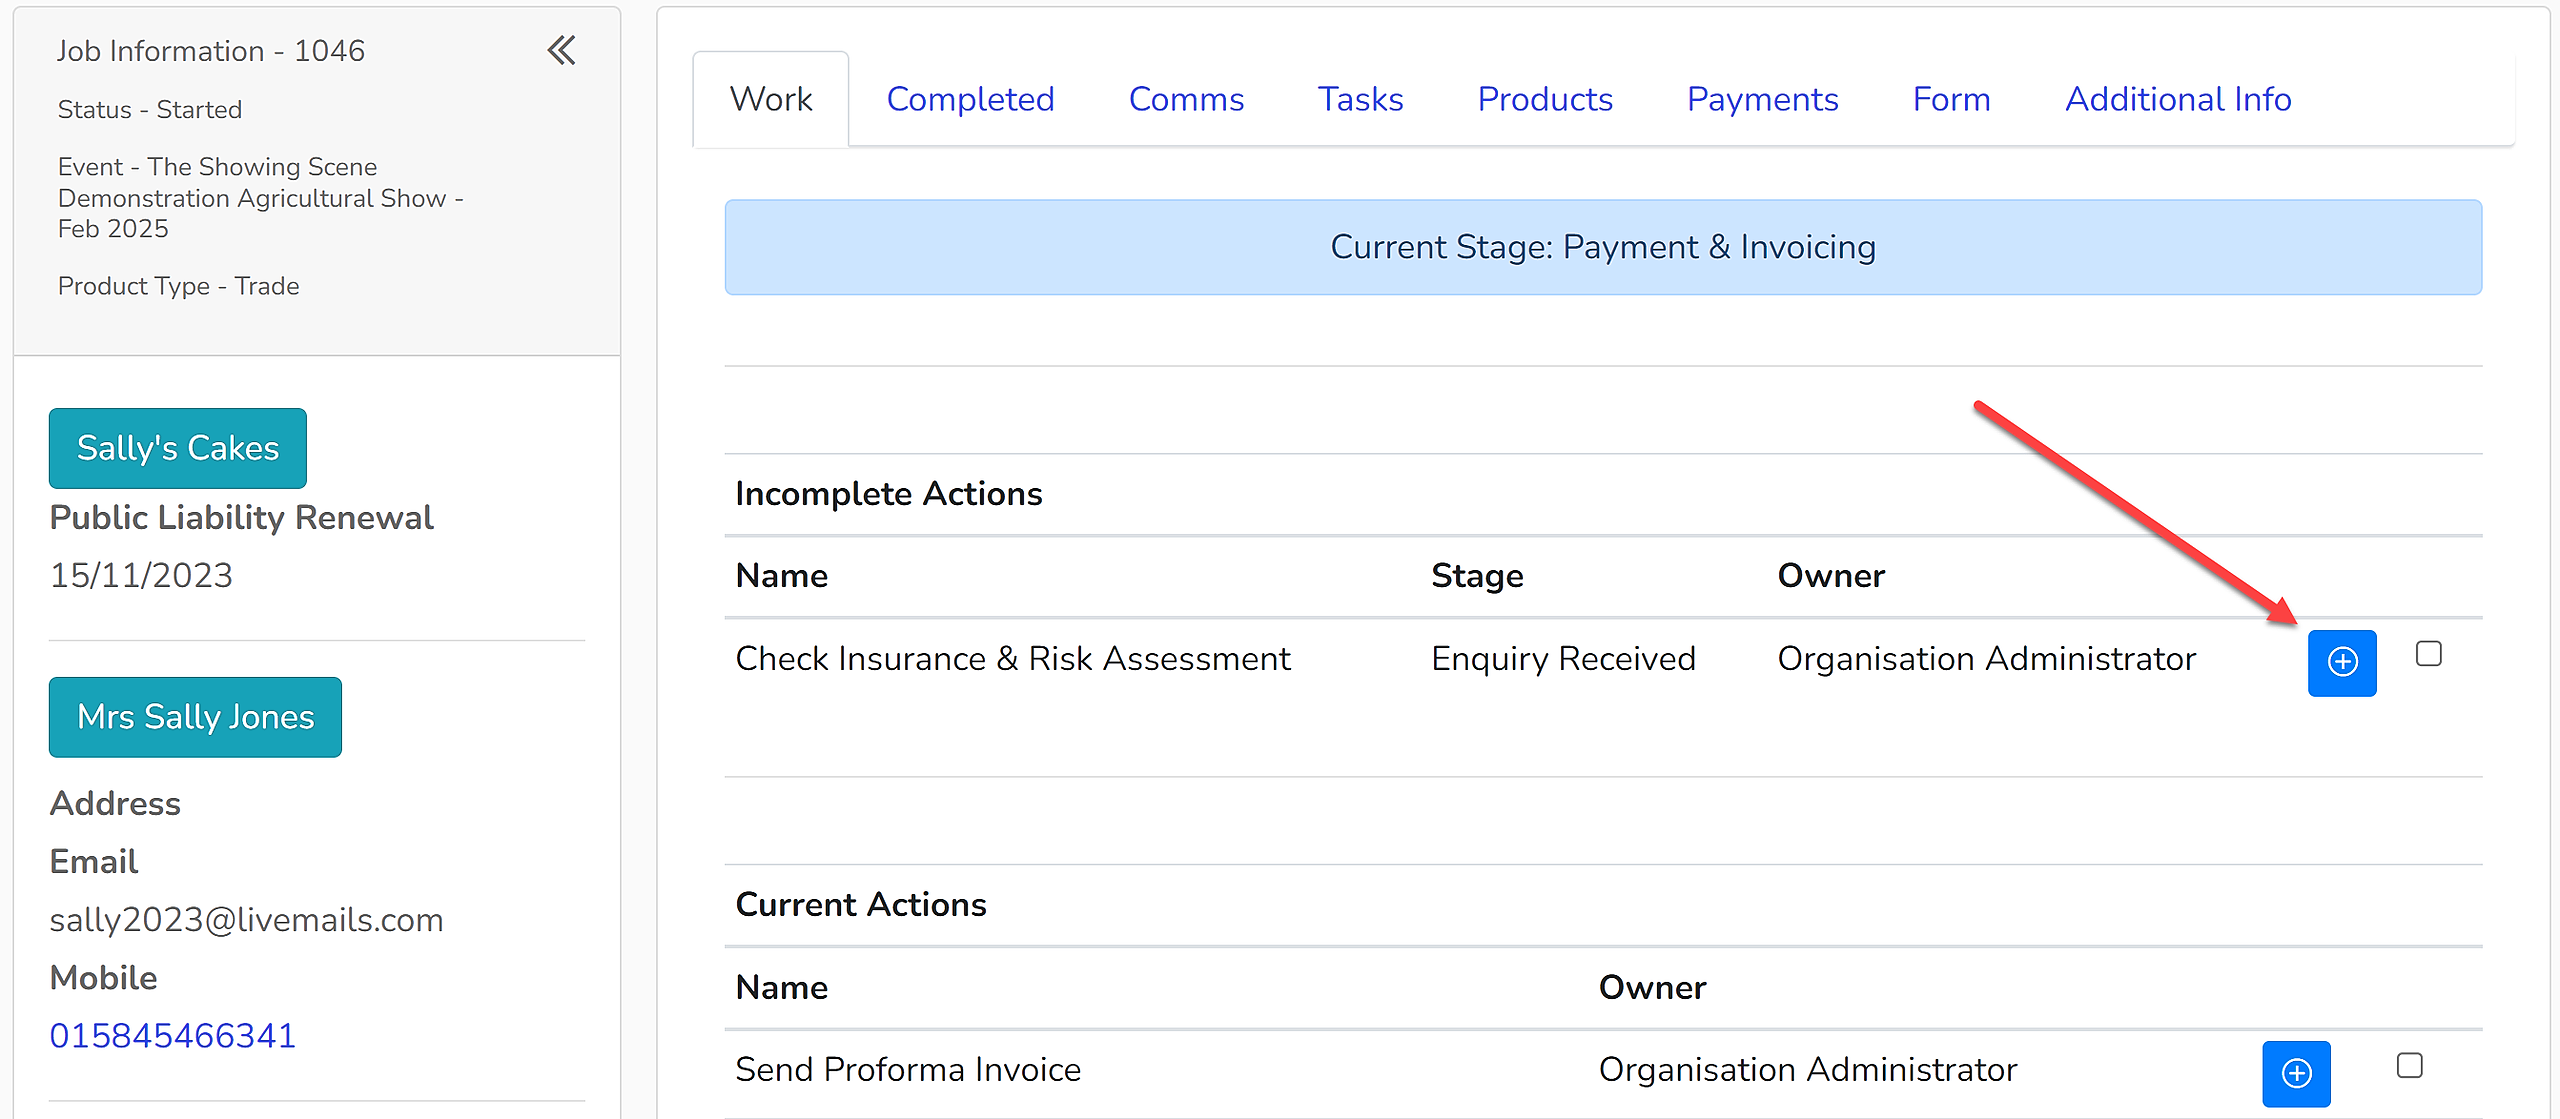
The enquiry will open on your workflow. This should have been setup with the Showing Scene team for you before your trade stands go live, however, they can be adjusted at a later date. It should be noted that enquiries are allocated the workflow as it stands at the time the enquiry is made and where changes are made to your workflow, they will only be applied to future enquiries.
The workflow should govern how you action your enquiries. Some actions will be set to complete automatically, such as when the balance has been paid, but some will require you to take action and mark the relevant action as complete.
To mark an action as complete, click the blue '+' icon.
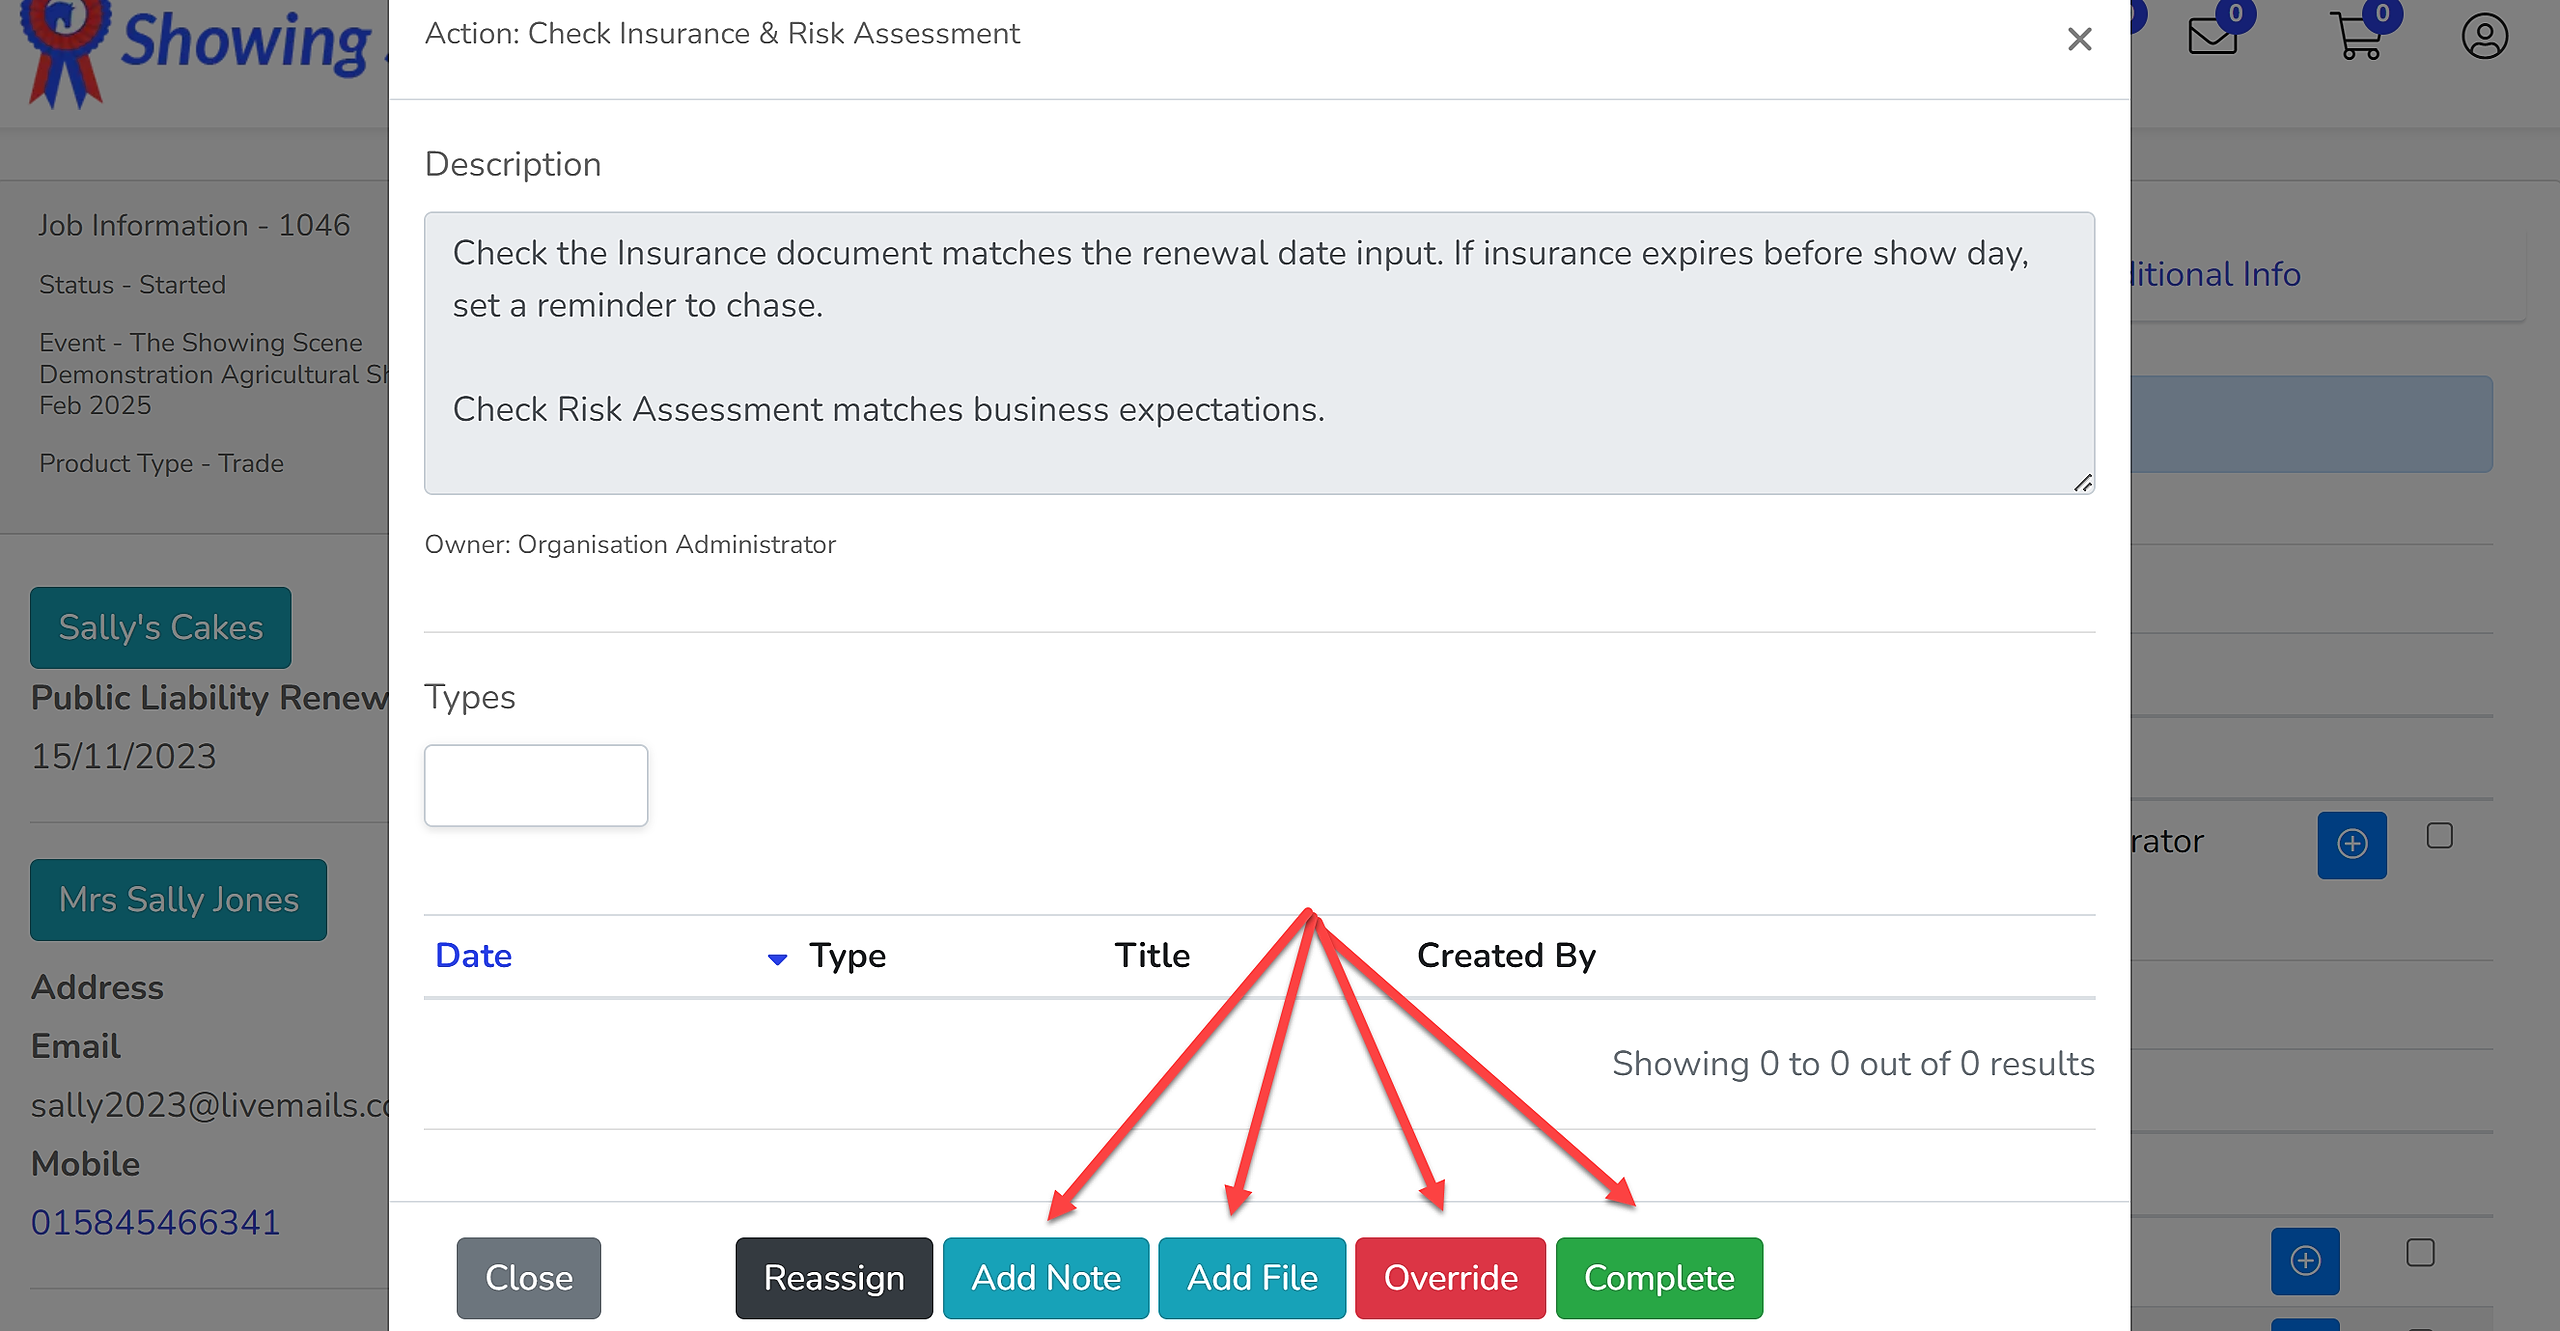
This will open up a new window. There may be further information about that action and there will be the ability to add notes, files and potentially a red 'Override' button if your permissions allow. A green 'Complete' button will enable you to mark the action as having been completed. If the button doesn't appear, either a required action (such as assigning a stand number) has not taken place or you do not have the permissions to complete the action.
Completed actions in your workflow, along with details of who completed the action can be viewed in the next tab, 'Completed'.
Enquiry Form
Generally, the very first thing you'll want to be doing with a new trade or sponsorship application, is to check their application form.
The 'Form' tab will enable you to view the form that was completed as part of the enquiry submission.
Check through each of the fields, ensure that data is as expected (e.g. telephone numbers have sufficient digits and email addresses are of an expected format). Any files that have been uploaded as part of the application form should be downloaded and the content checked. Beside each file is a 'Download File' button:
Where you have requested a copy of their Public Liability Insurance, ensure you check the expiry date matches the date that has been input into the 'Public Liability Insurance Renewal Date' field, if you have requested this data. The 'Public Liability Insurance Renewal Date' field controls the 'Public Liability Expiry Report' which can be used to chase traders for copies of their new insurance documents upon renewal.
Data within the forms can be edited and new files can be uploaded/replaced where traders forward updated documents to you - just remember to hit the 'Save Form Information' button at the bottom of the page once you've made any amendments.
Products
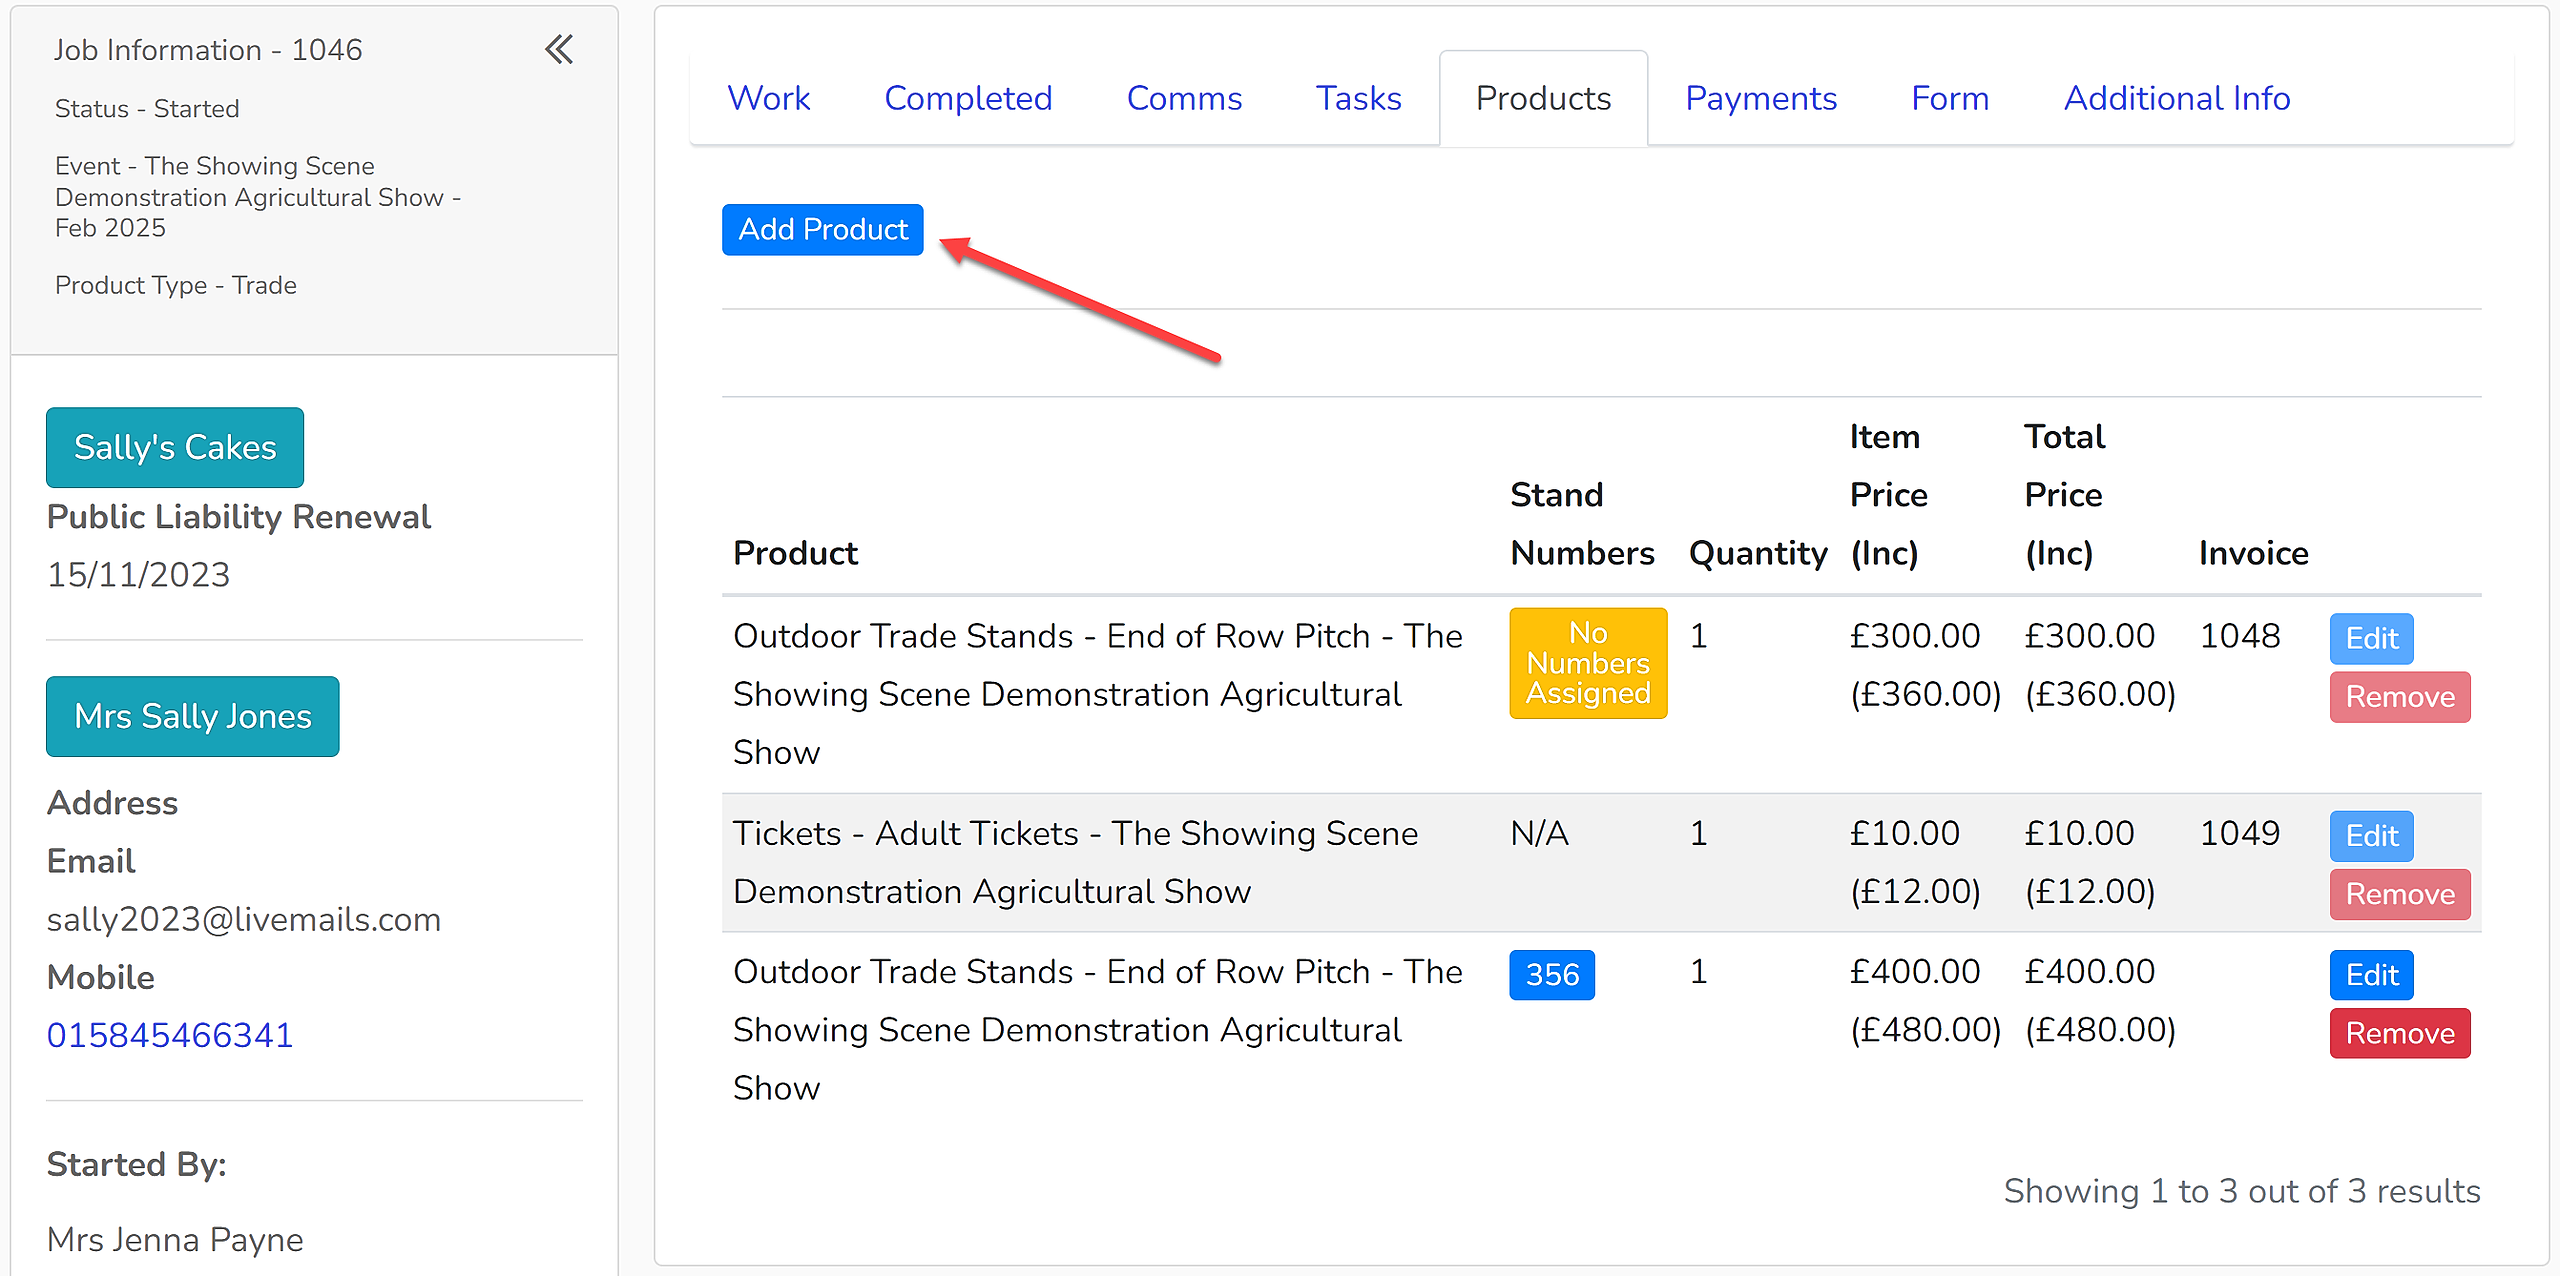
The products that have been selected or purchased by the trader can be viewed in the 'Products' tab.
This tab will provide a list of each of the products and the number of each that have been purchased. Until an invoice has been raised against a product, the product can be edited using the 'Edit' button to the right where the price and quantity can be adjusted. Products can also be removed using the red 'Remove' button to the right of each product or new products can be added to their list using the 'Add Product' button.
Once an invoice has been raised against a product, it cannot be edited or removed from the product list. The invoice will first need to be cancelled (which will automatically raise a credit note against it) before amendments can be made.
Trade stand numbers an be allocated by clicking 'No Numbers Assigned' and inputting the allocated trade stand number before clicking 'Save'.
Payments
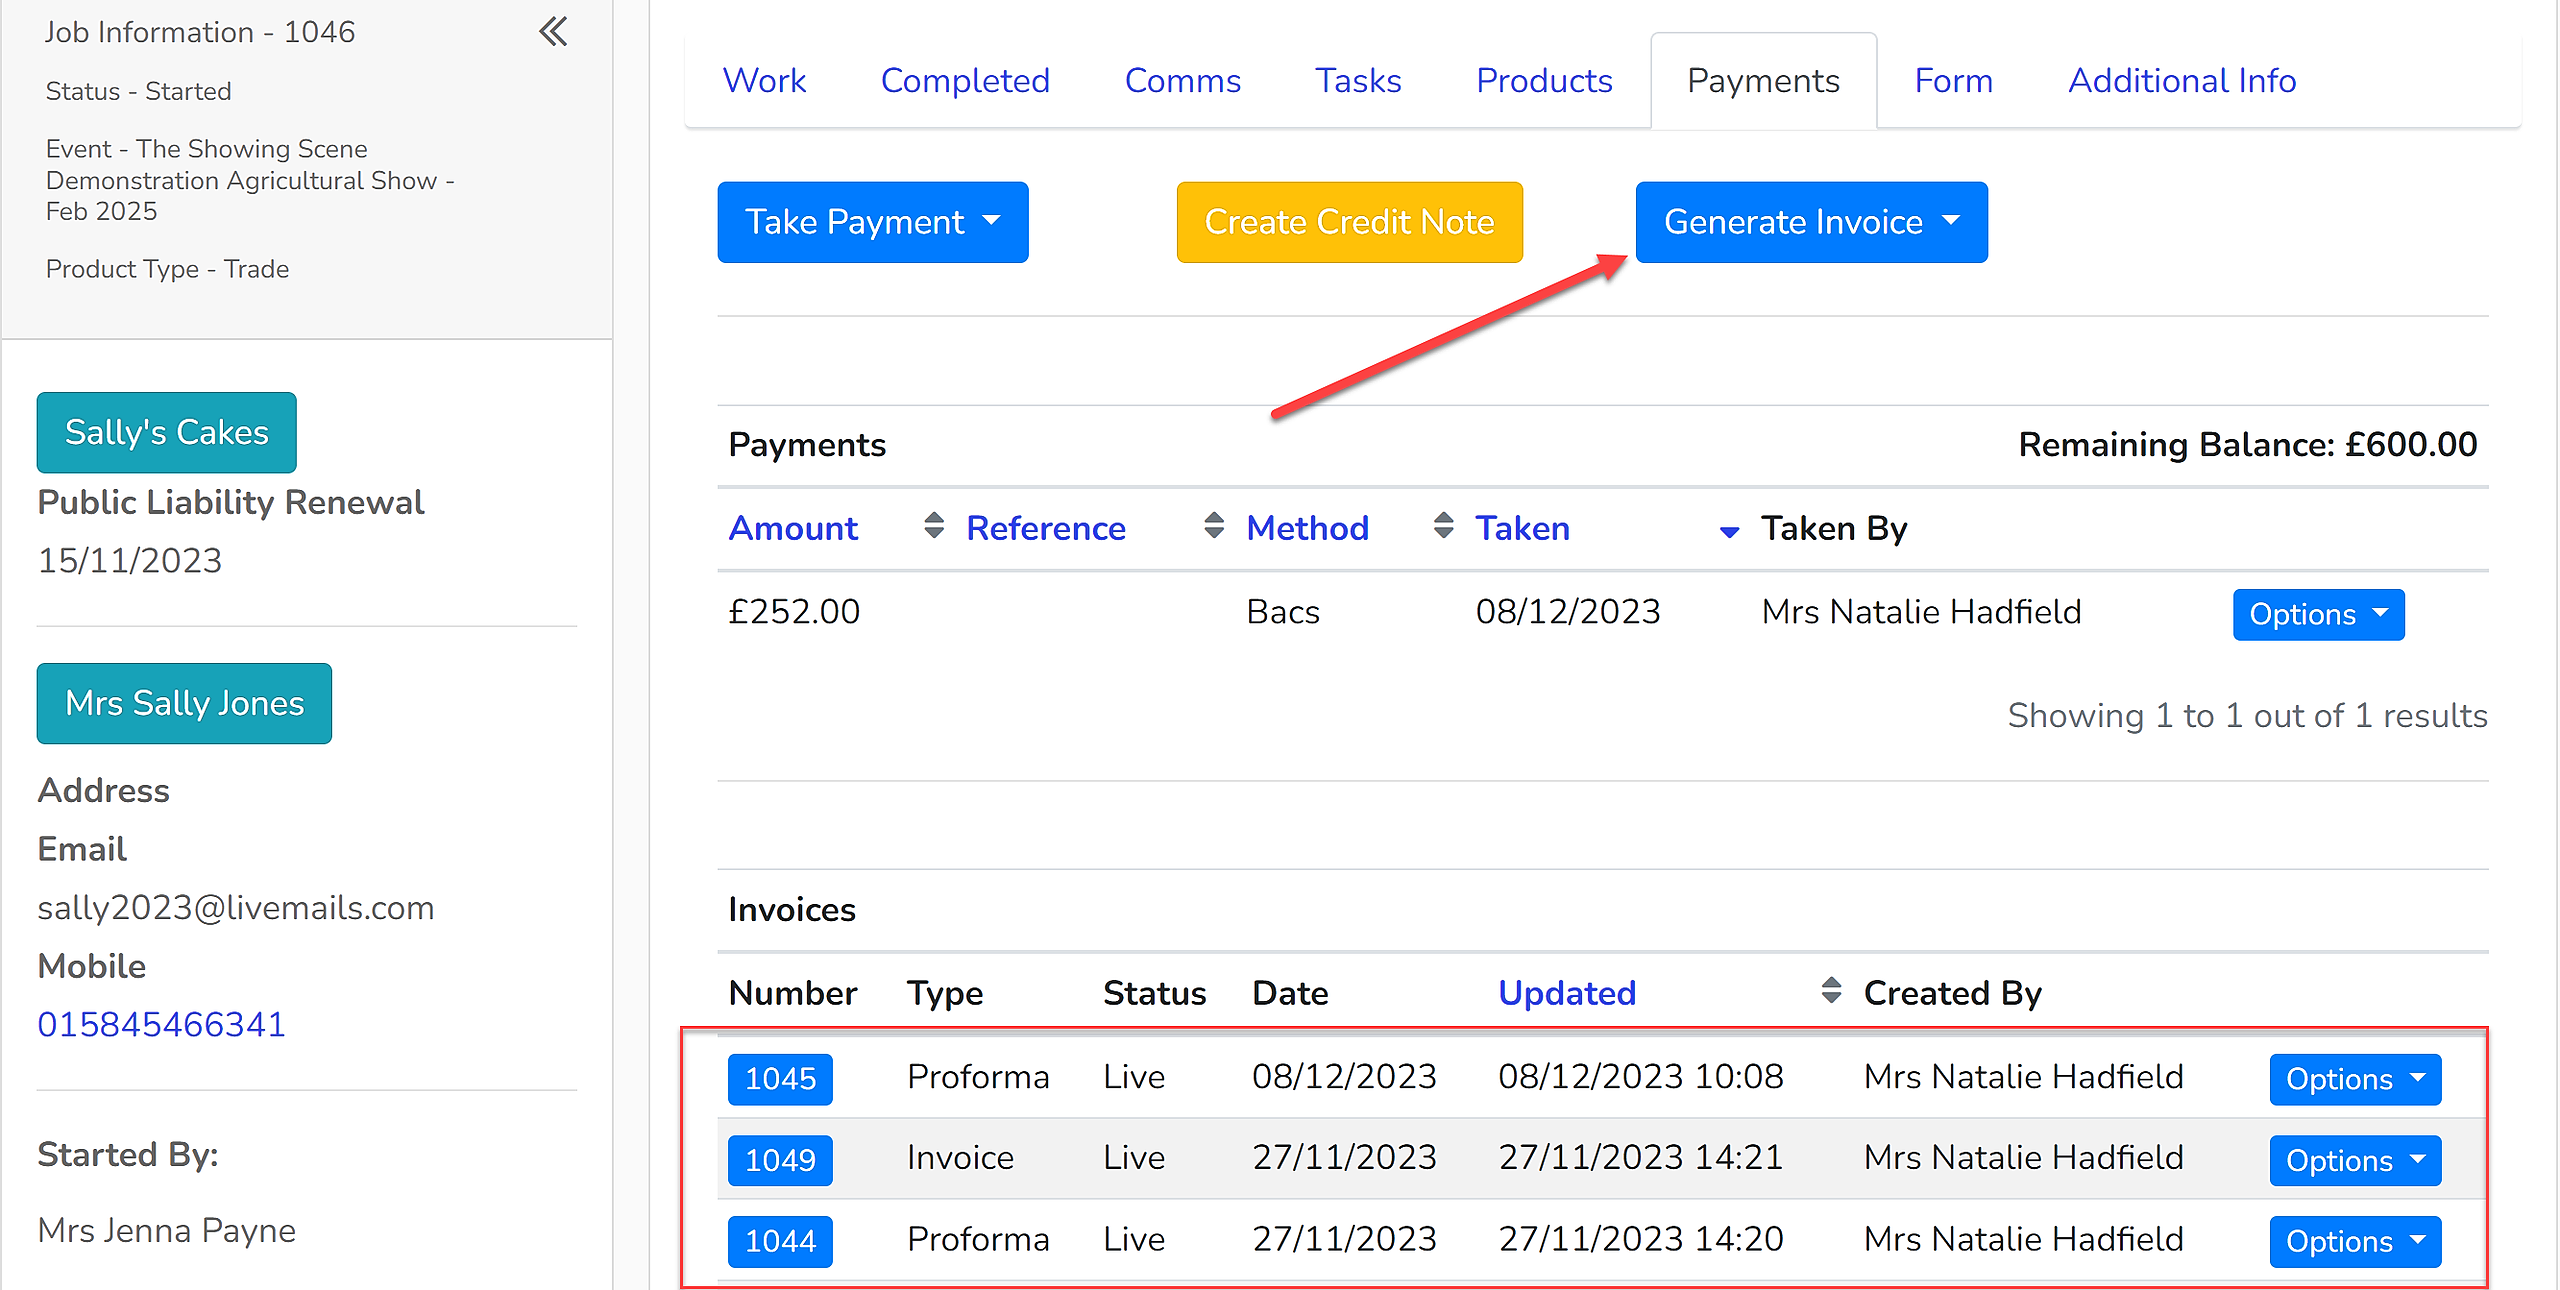
All payment and invoicing records can be found under your 'Payments' tab.
Any payments that have been recorded will be listed under the 'Payments' section including the method of payment, the date the payment was taken (or recorded), who logged that payment and a dropdown menu for 'Options' where connected invoices can be viewed and refunds can be made. The outstanding balance is also shown.
An invoice should be generated for each enquiry, regardless of whether it is being issued or not, as it is only upon the production of an invoice that the accounts reports will be updated. Invoices can be created using the 'Generate Invoice' button and will be listed at the bottom of the page. Each time an invoice is generated, a copy will automatically download to your device.
To the right of each invoice will be a dropdown menu titled 'Options'. This can be used to download a copy of the invoice or cancel the invoice. Cancelling the invoice will automatically raise a credit note against it. For full invoices, there is also the option to 'Update Address'. This is used where the address details of the enquiry have been updated and will require the address of the invoice updating.
Payments taken outside of the system will need to be logged and payments can also be made by card on the telephone through Showing Scene. Click 'Take Payment' and select either 'Phone' to take a telephone payment, or 'Bacs/Cheque/Other' to log a payment that has been taken from outside the system.

