Email templates are created to be sent out in bulk through the 'Email Marketing' suite or they can be emailed out to individual contacts in the CRM.
- From the CRM, open 'Email Templates'.
- To begin creating a template, click 'Add Email Template'.
We recommend that you begin by creating a 'blank template' that you can use as the basis for all your others. This will contain your branding: logo, colour schemes, footer information etc. This template can then be copied and edited for use.
- Input your 'Template Name'. This is for your own reference and allows you to identify the email template.
- 'Default Subject' is optional - this is the subject line that would be included in the recipients inbox. The subject line can be edited before the email is issued.
- 'Template Type' - Select 'Marketing and Individual' unless it is being used for your judges and stewards management.
- 'Organisation Template Type' - This is a useful means of being able to categorise email templates, such as 'Livestock', 'Trade' or 'Membership'. To create your categories for template type, go to the CRM, click 'Dropdowns' and select 'Email Template Organisation Type'. Create a new row for each of the template categories you require. These can be added to anytime. By using this feature, it is also possible to filter down your list of email templates when you have a large number of templates created.
EDITING THE EMAIL
Adding an Image
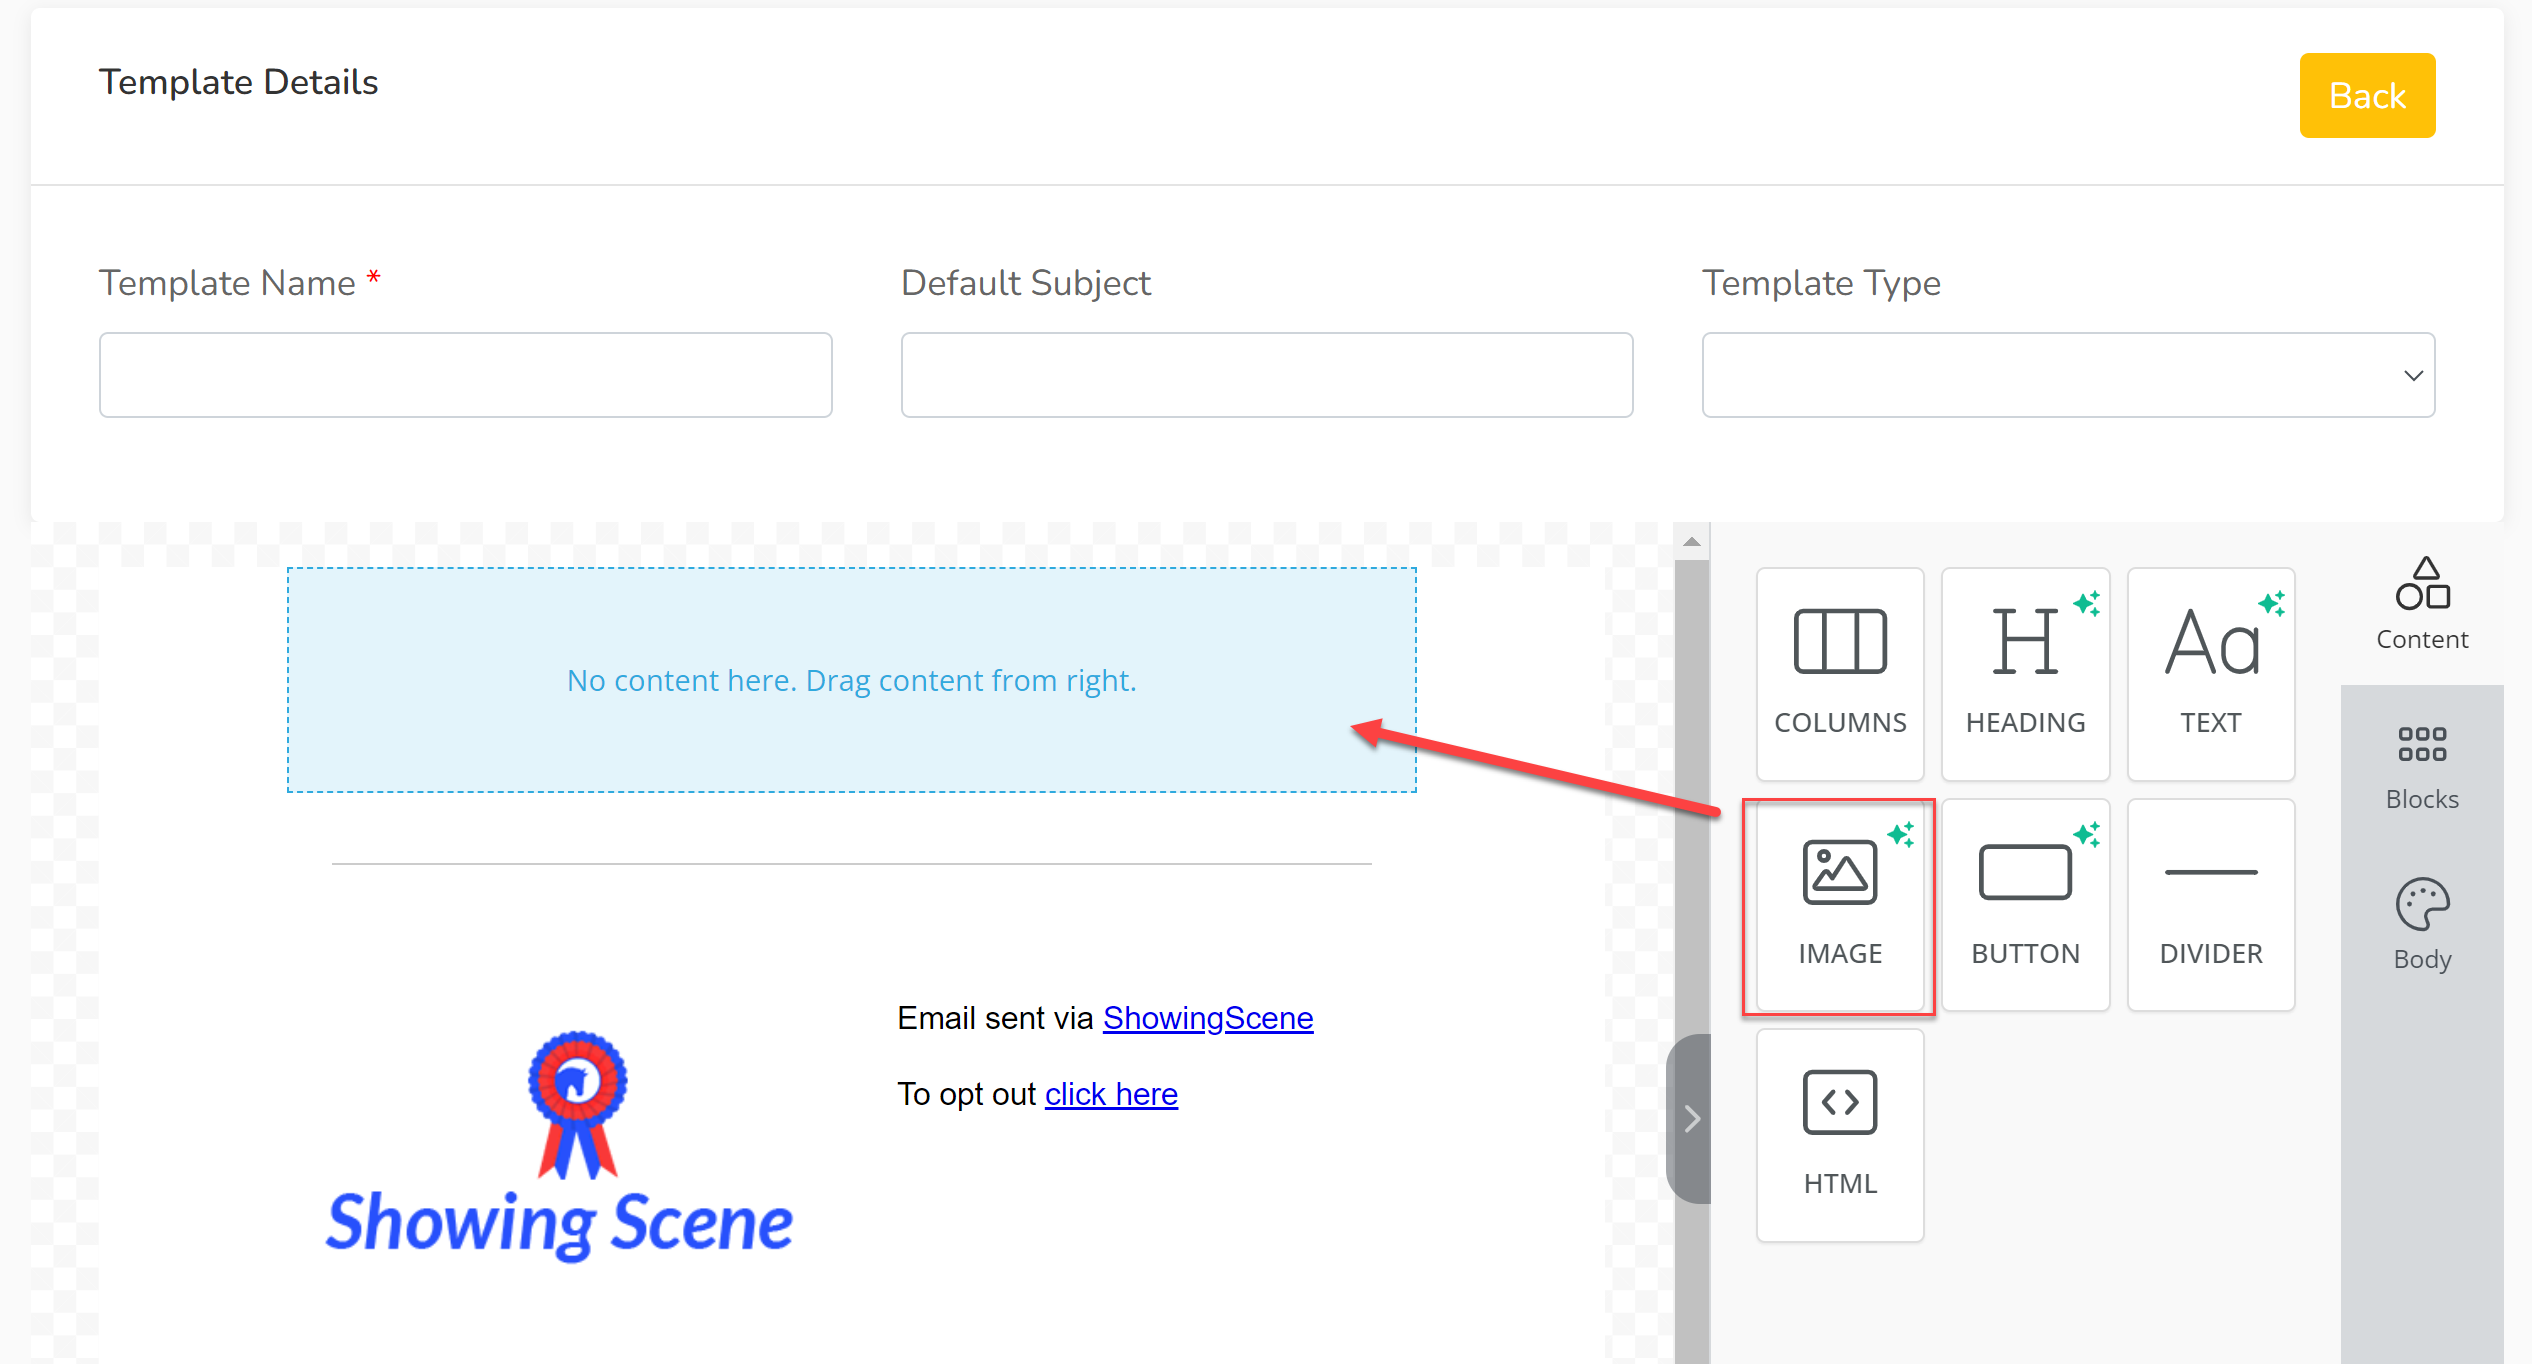
Drag the 'Image' icon into the content field.
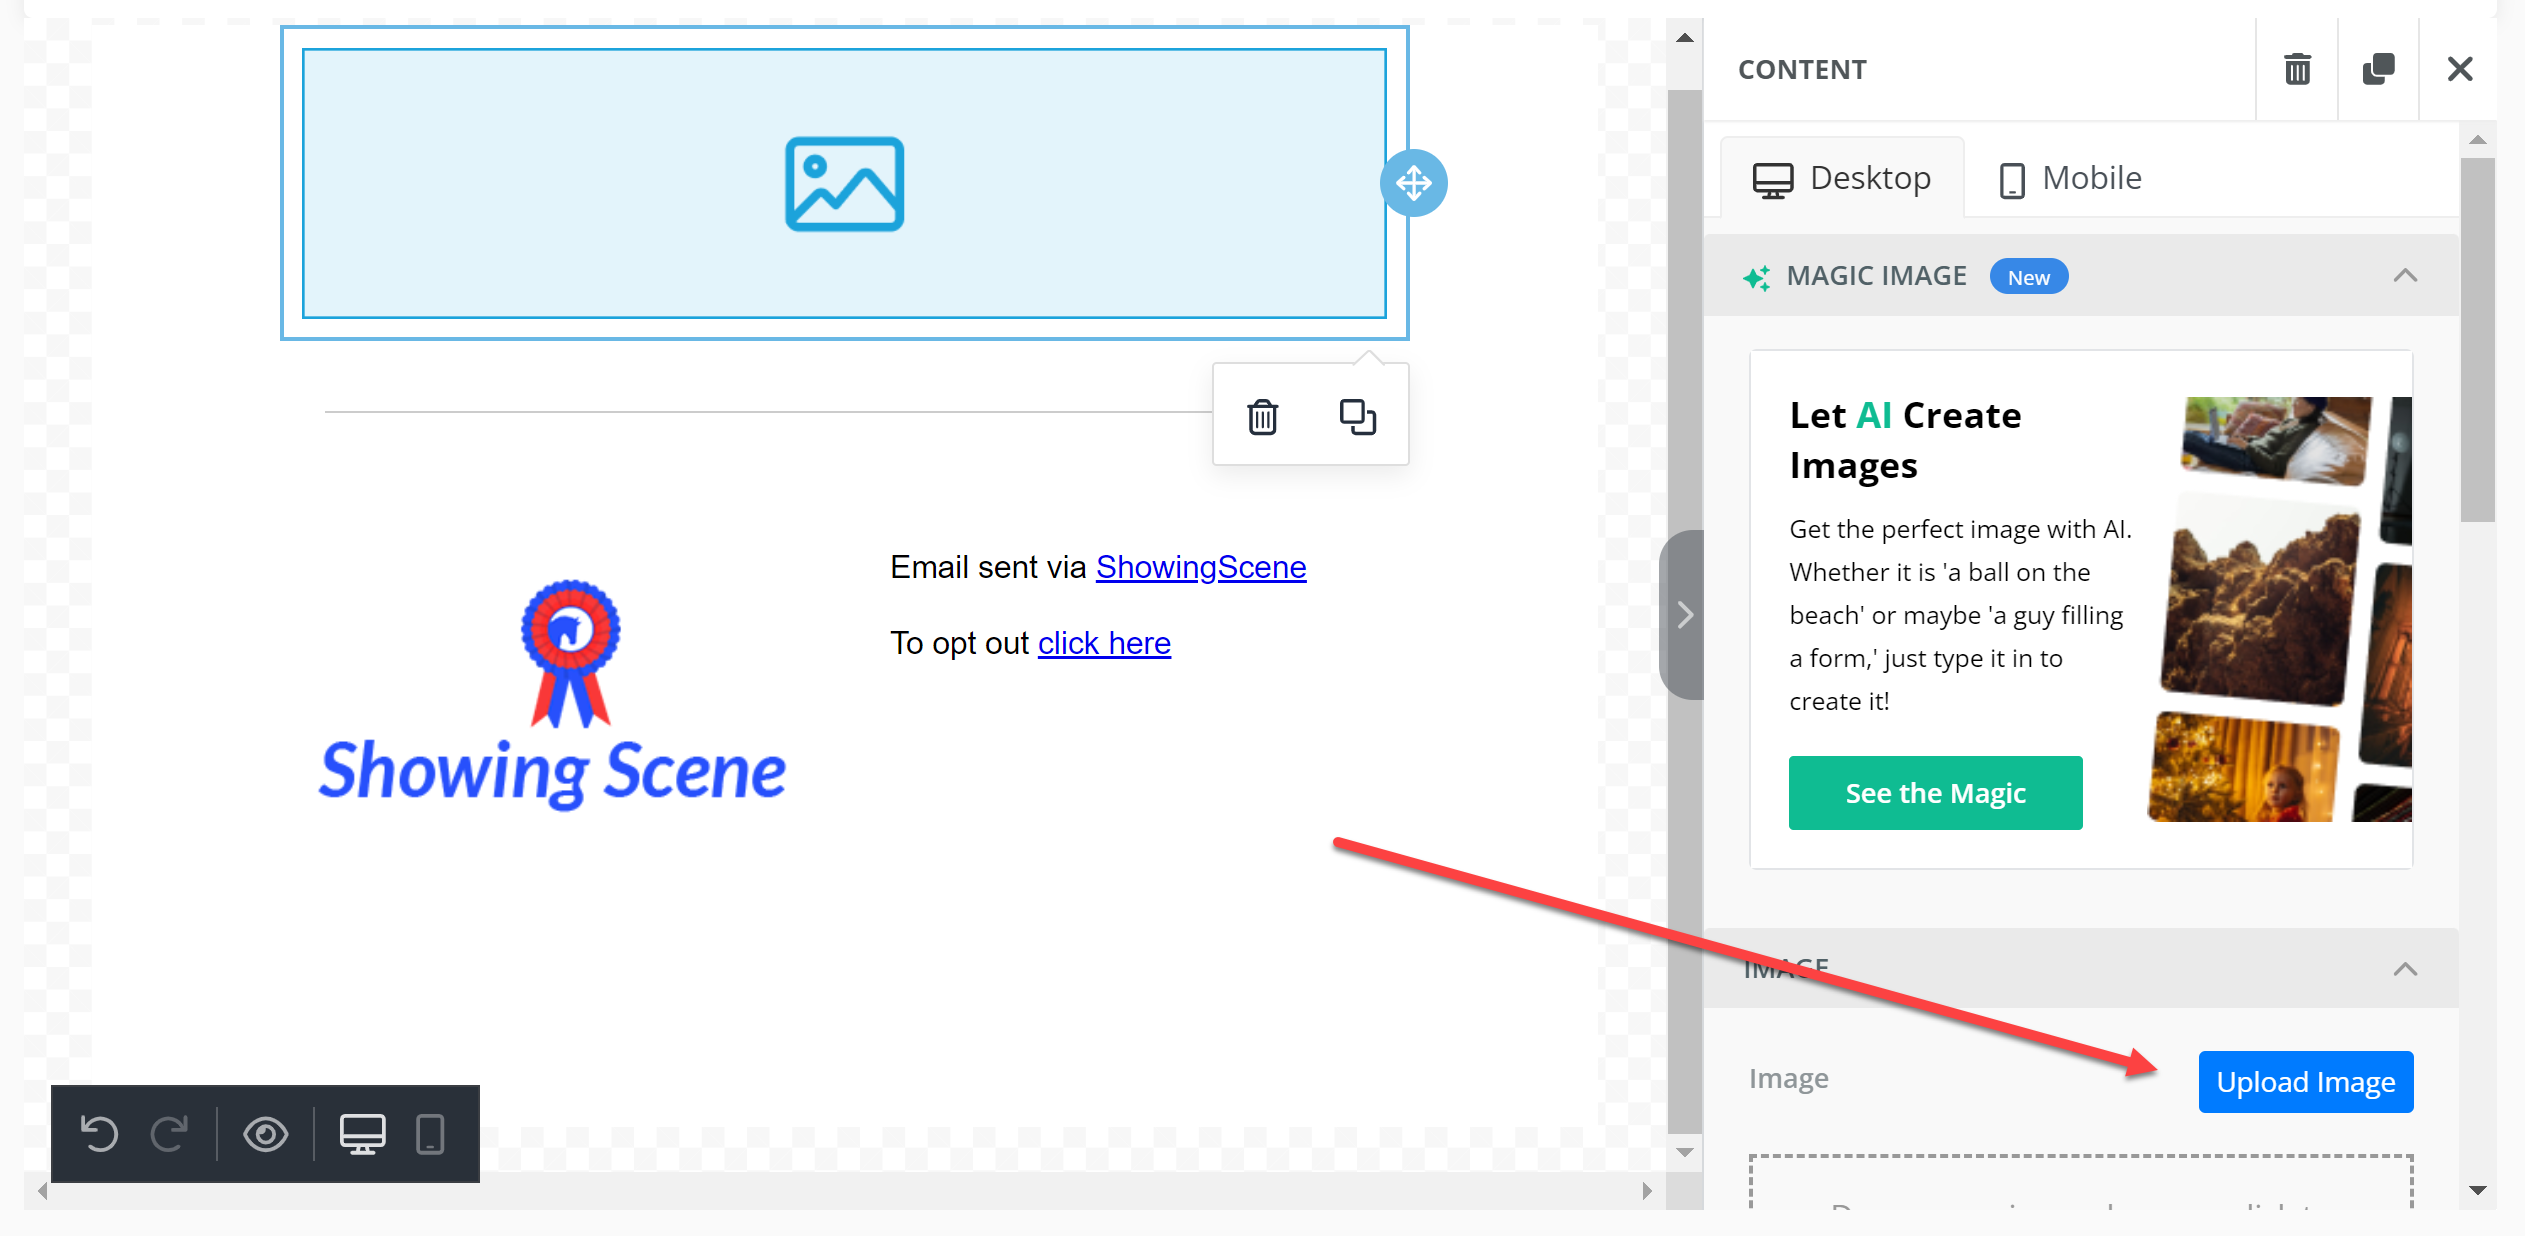
The image field will now automatically highlight and the column to the right will enable the field to be edited. First, select 'Upload Image' and select the image to be included.
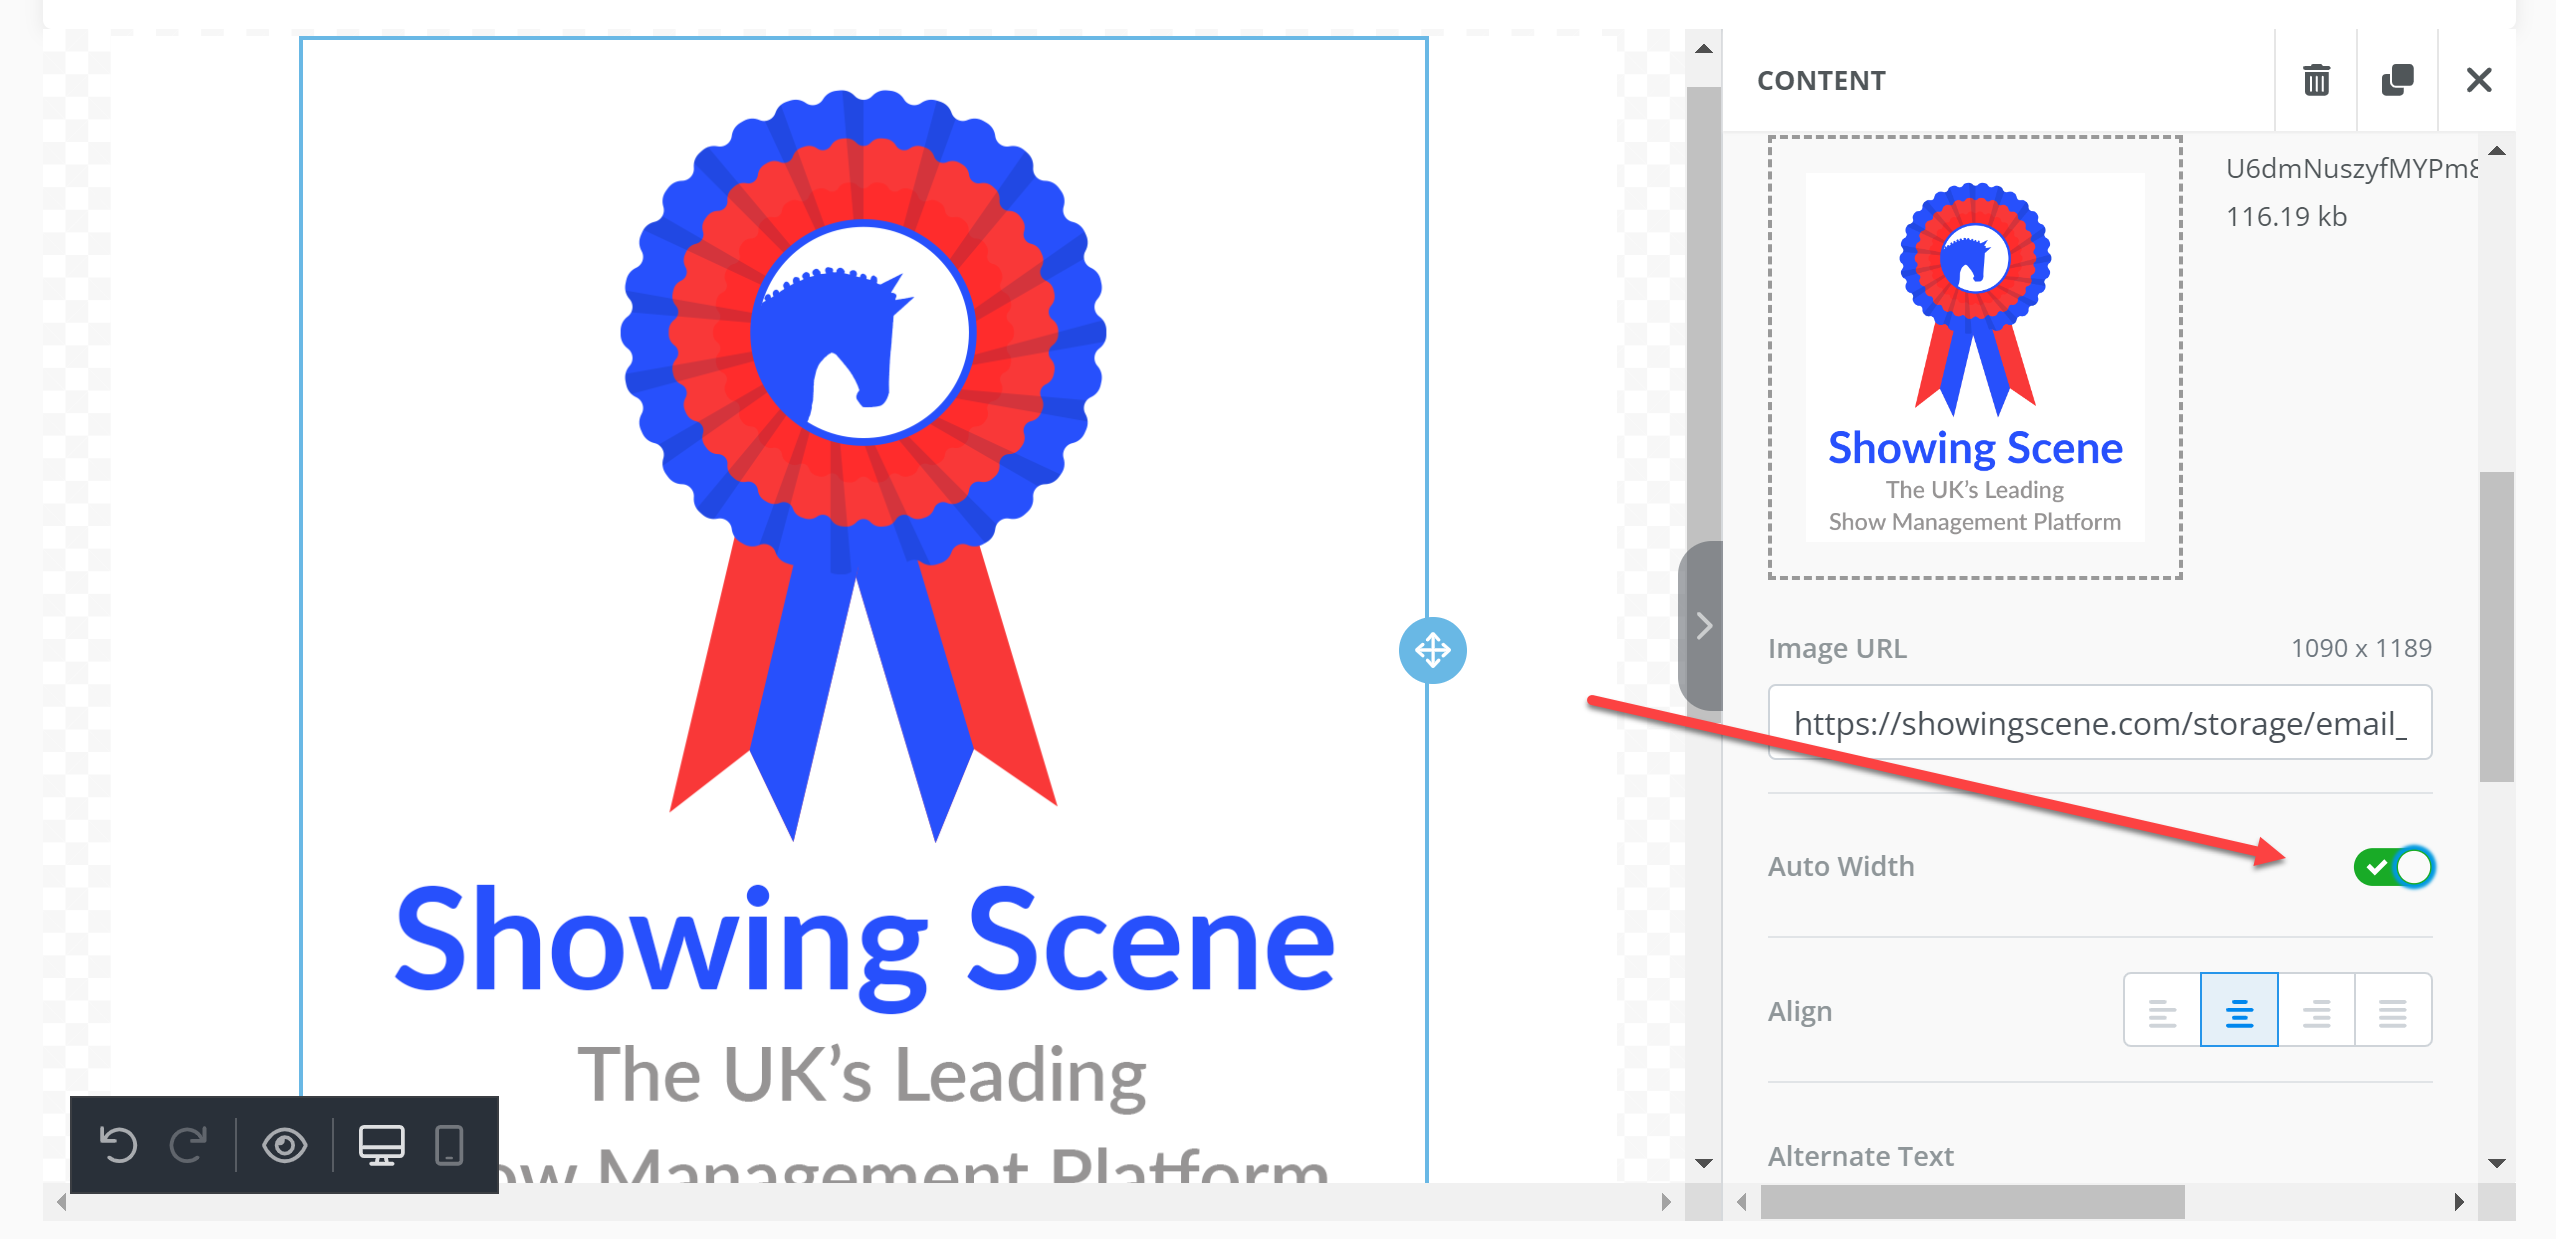
The image will automatically fill to the width of the field. To change this, scroll down the right hand column (highlight the image again if the image editing suite has been lost) and uncheck the green 'Auto Width' slider:
This will bring up a larger slider below which can be moved to adjust the size of the image. Further down this column are more editing options, such as where to align your image on the page or whether to add a hyperlink to it.
Mobile Friendly
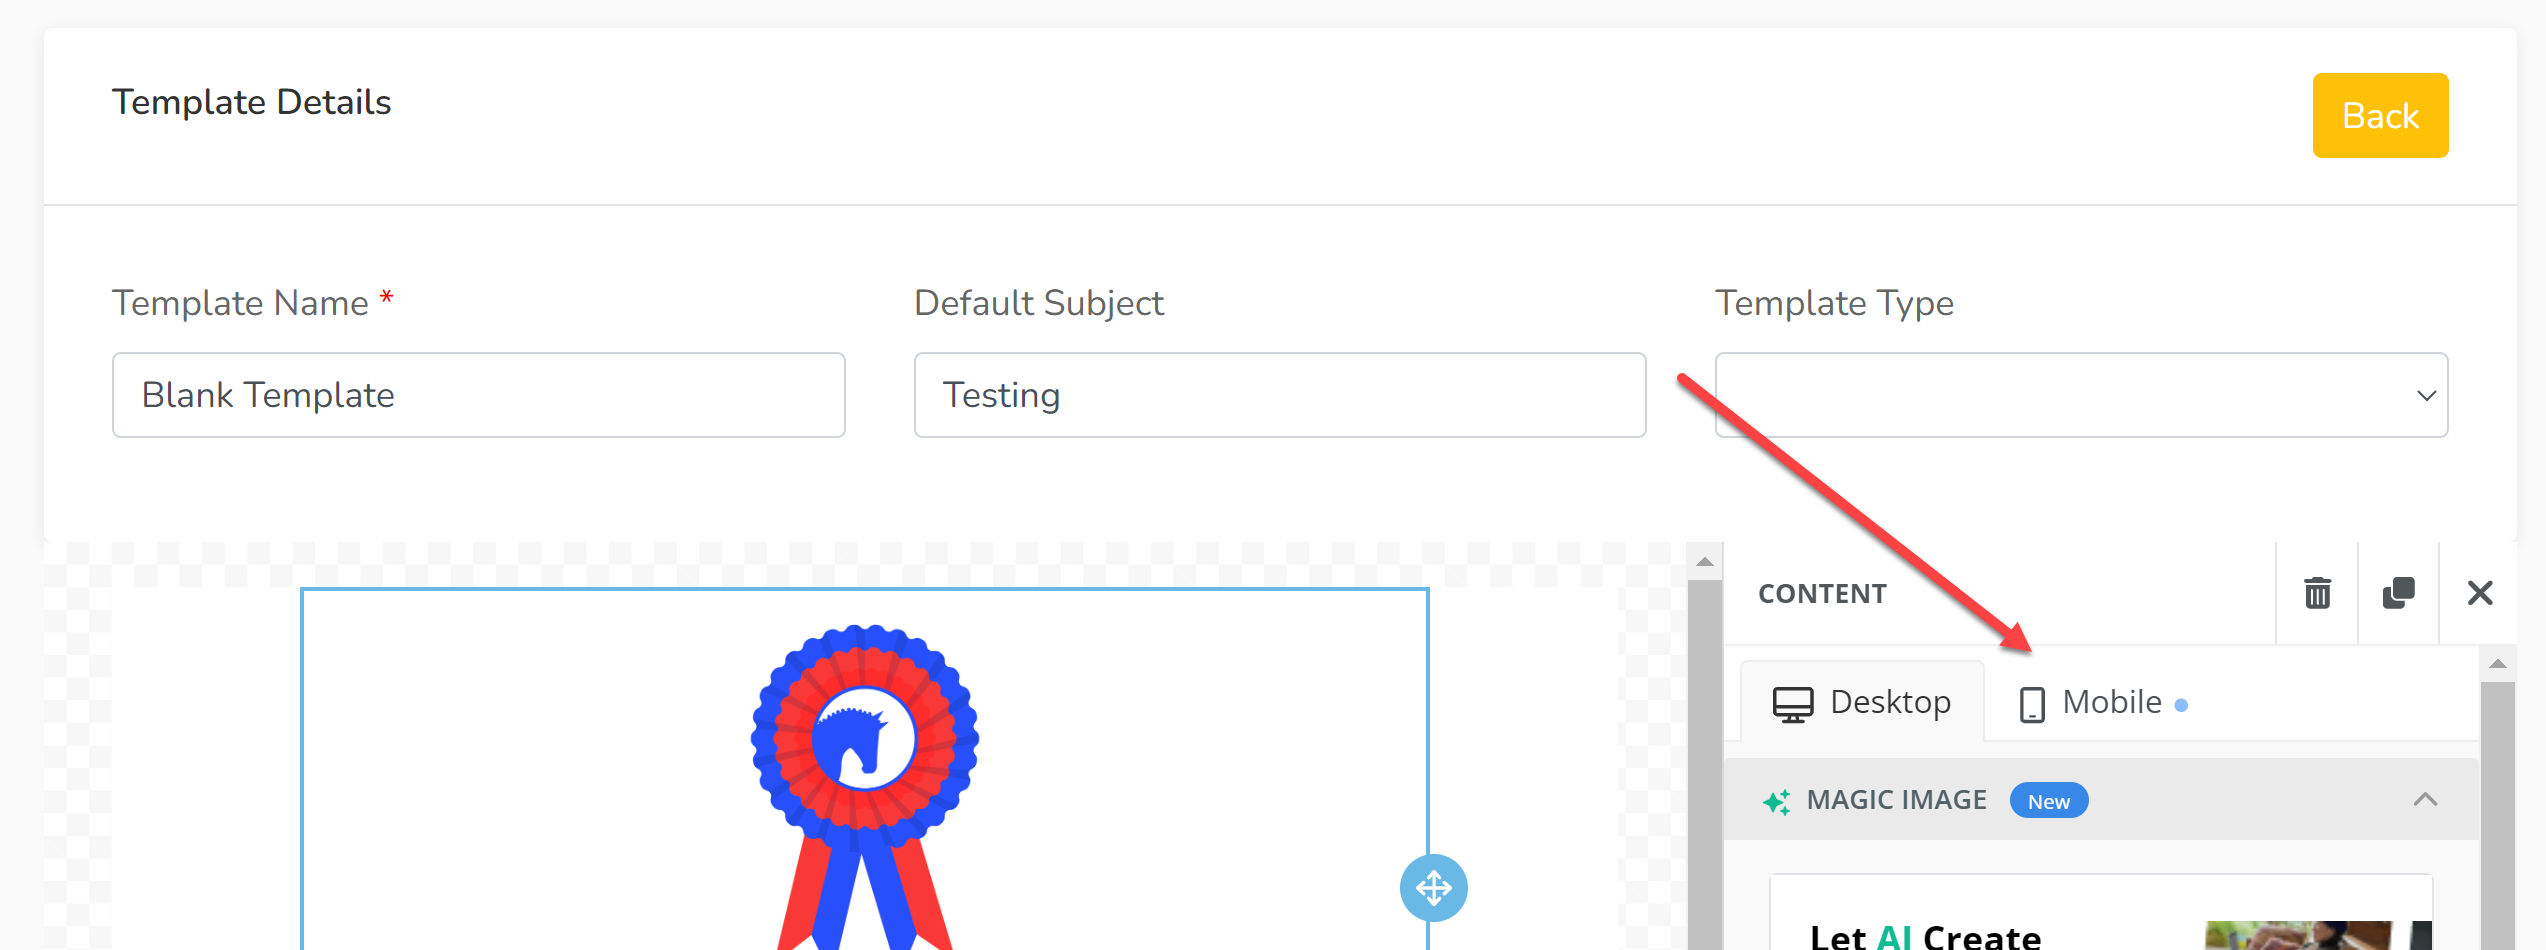
During the creation of the email, there is the opportunity to check that is is viewing as you'd like it to on mobiles. The majority of users now view emails on mobile or tablet devices, so it's important to consider these settings. As you create content, use the 'Mobile' tab to view the email as it would be viewed on a mobile device and use the column below to make any amendments to how the element is viewed.
Adding a Headings & Text
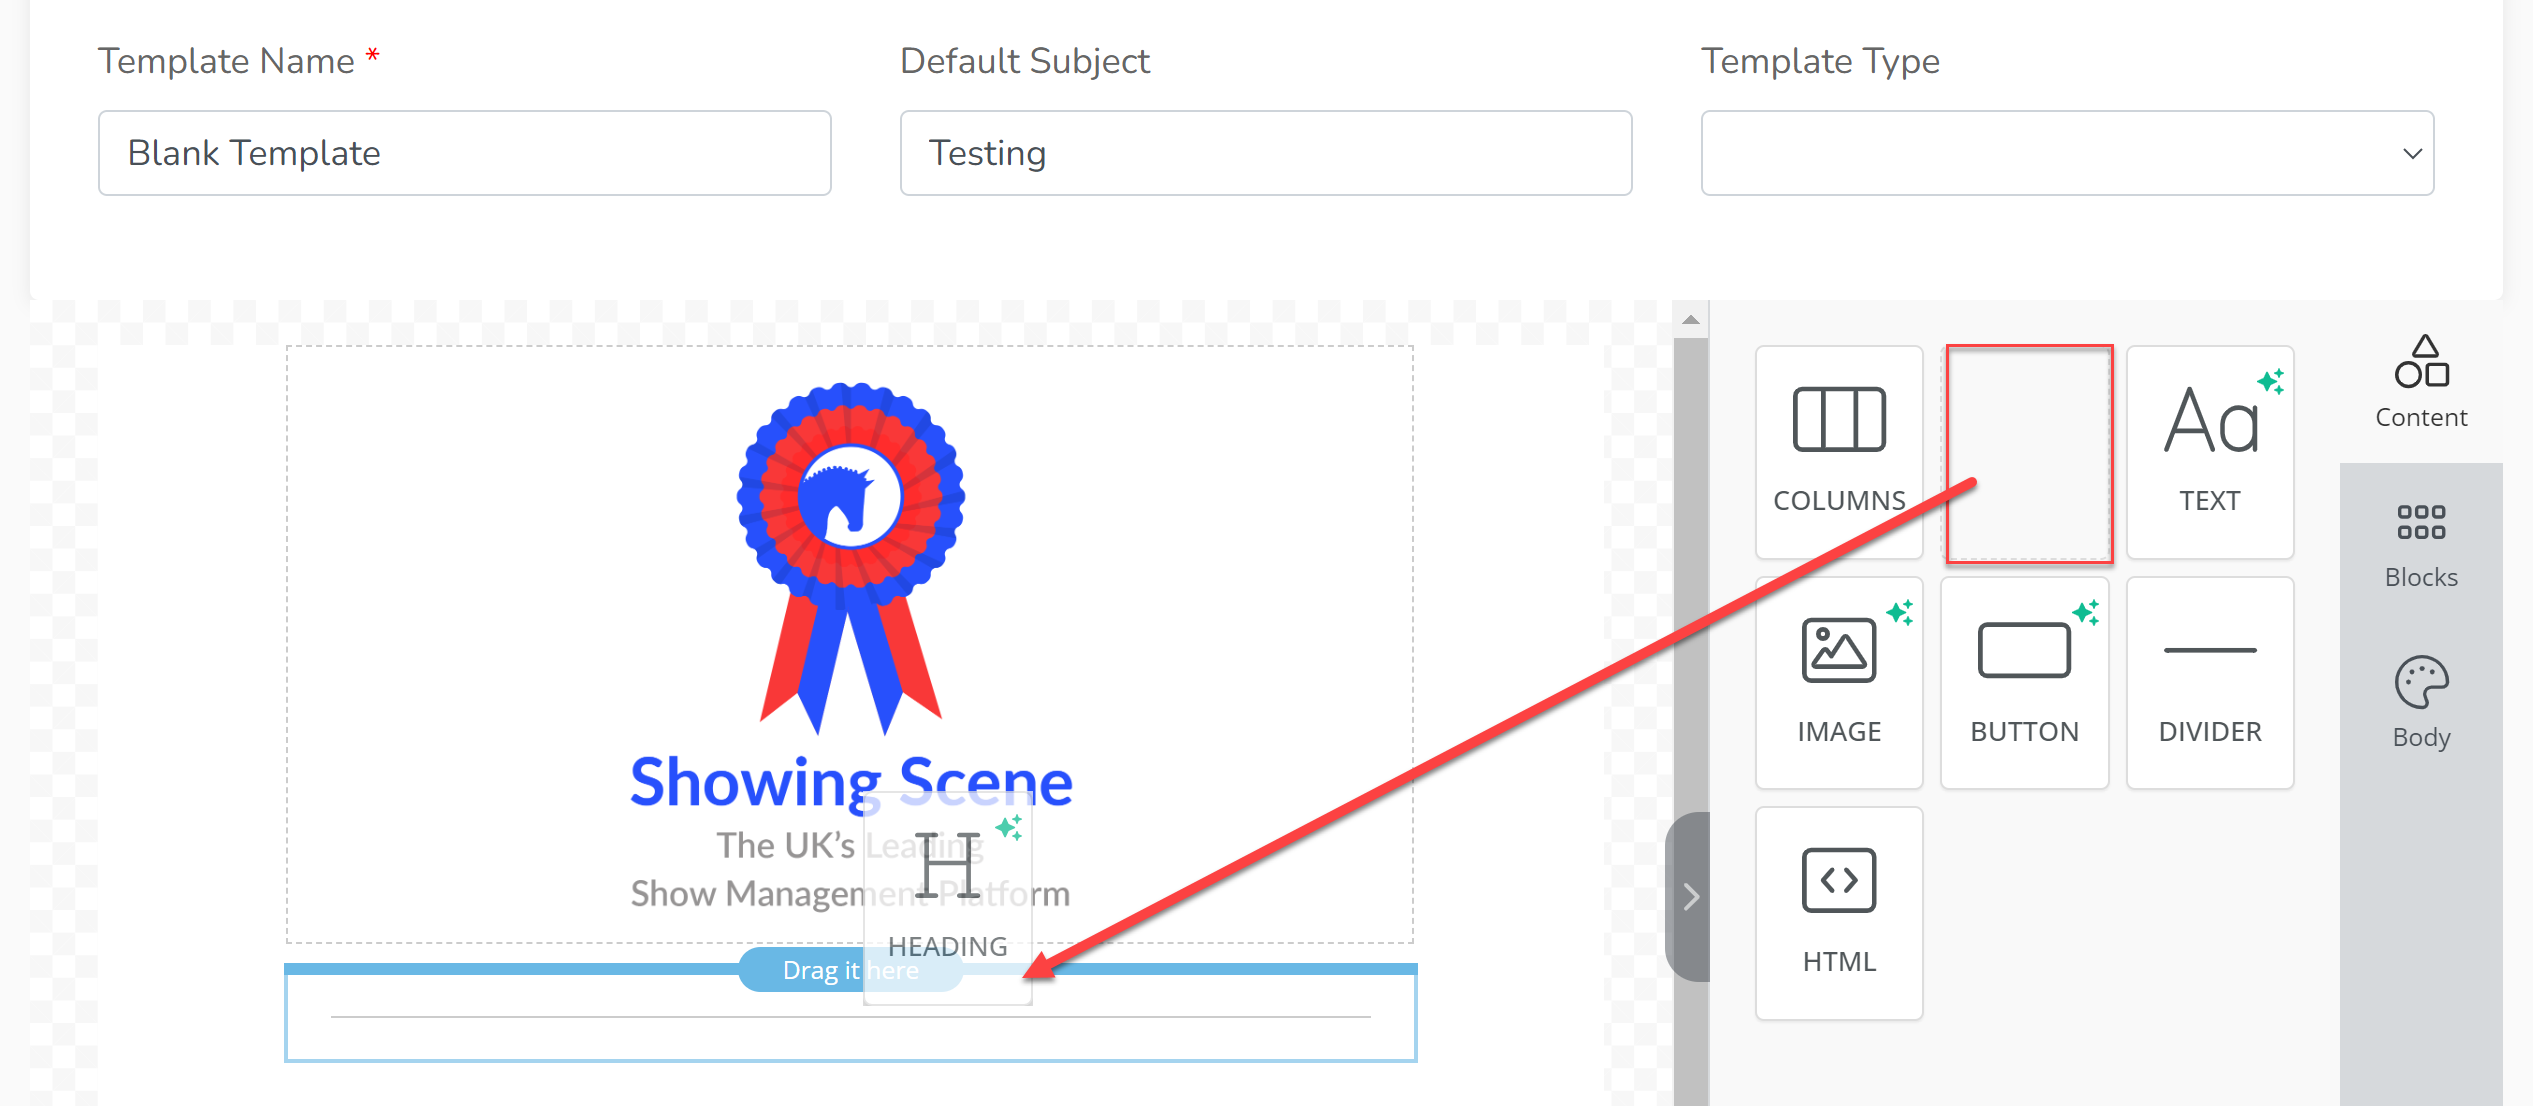
Drag the 'Heading' or 'Text' icon into the email. The icon can be dragged anywhere in the email. It will be dropped wherever the blue bar with 'Drag it here' appears.
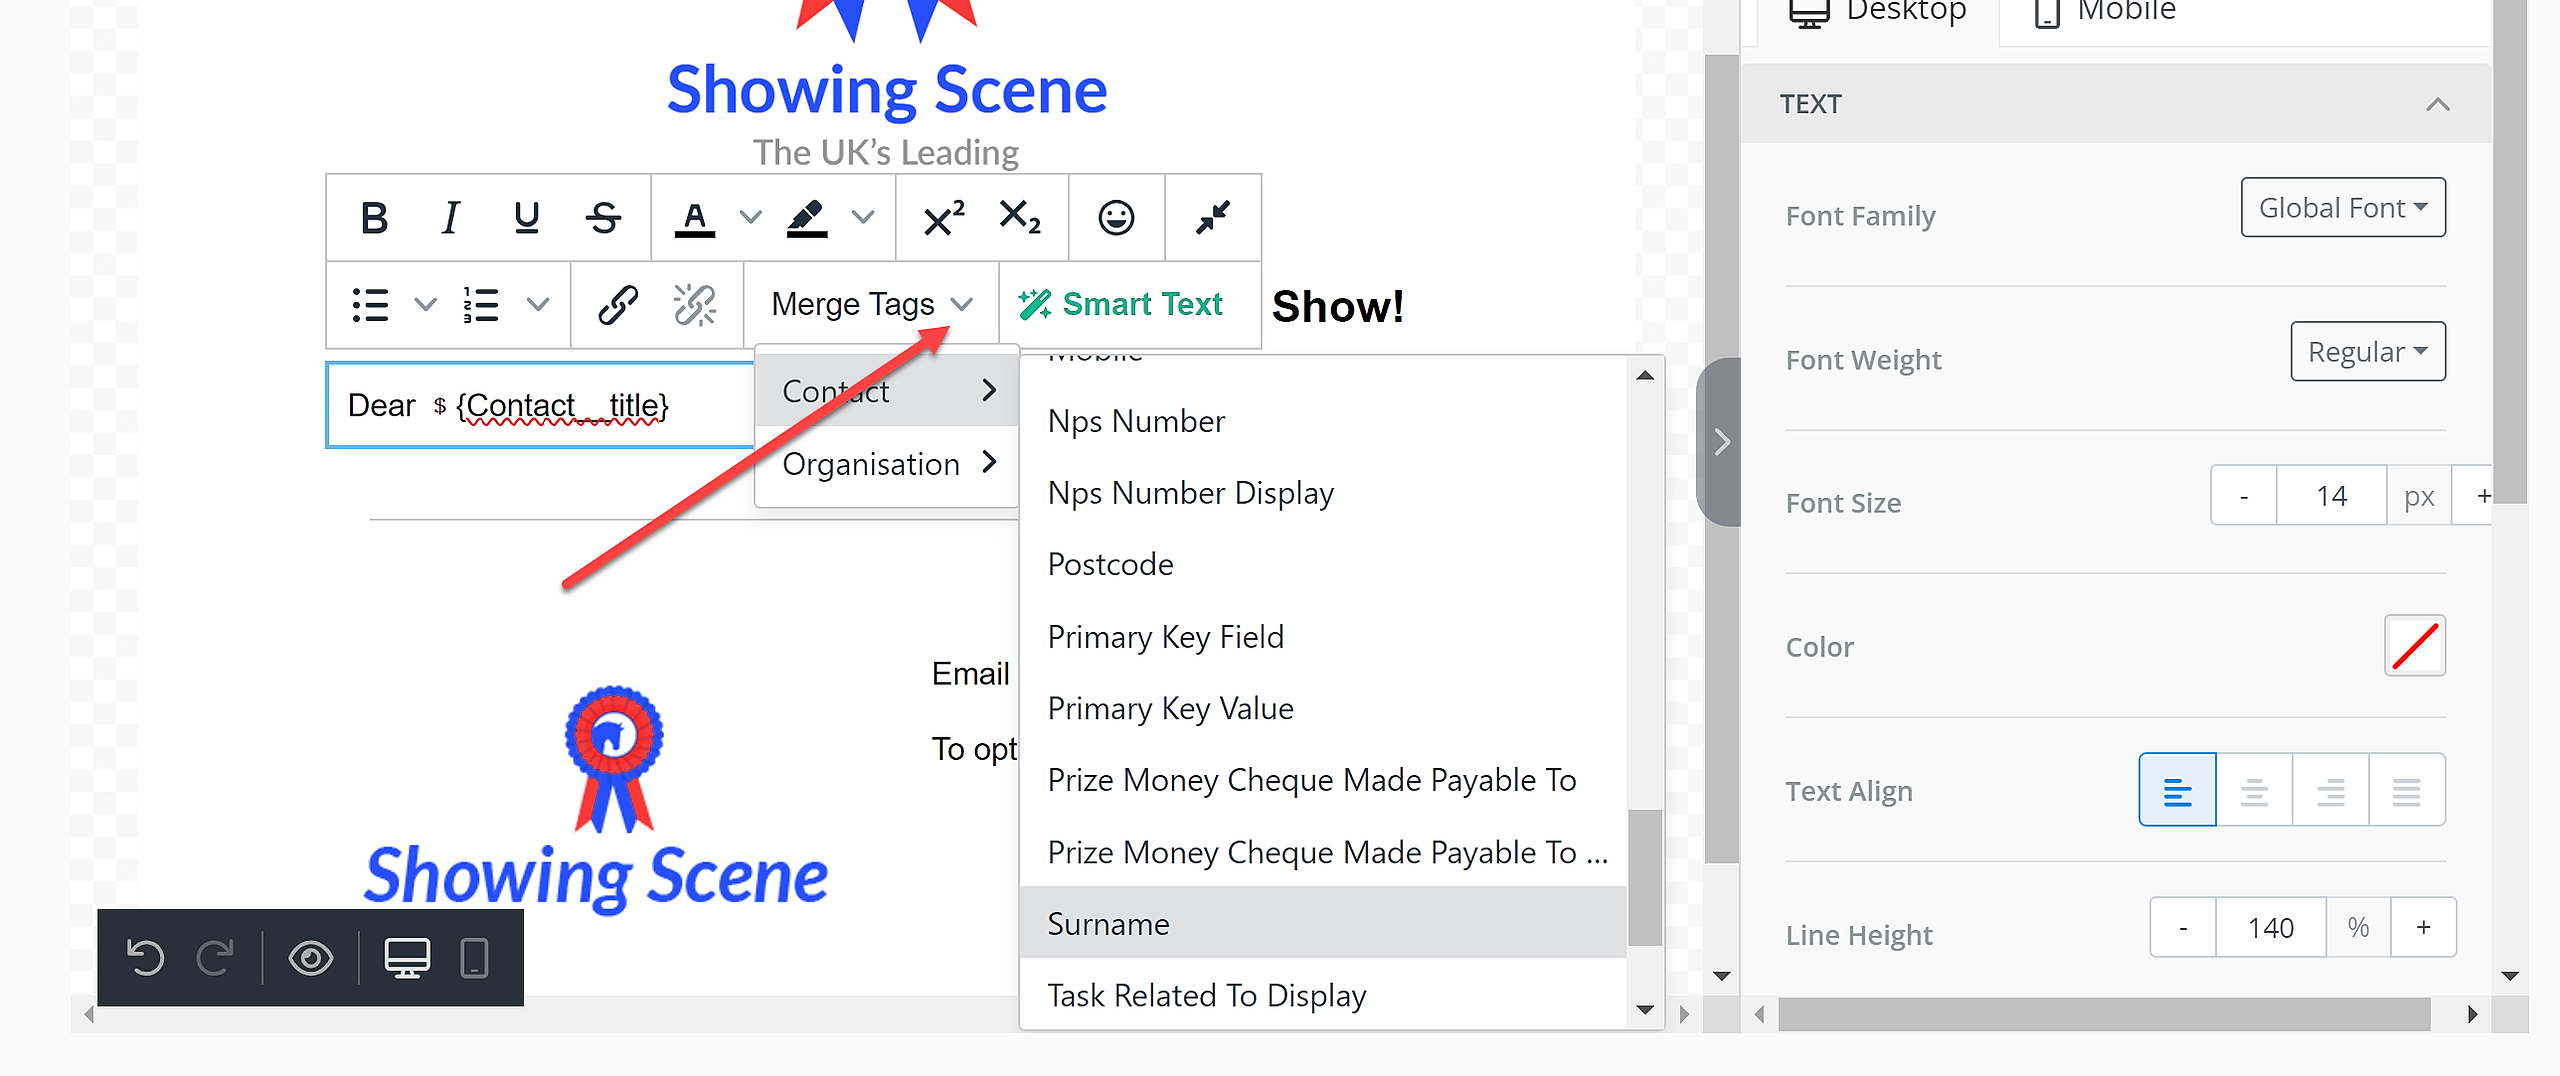
The heading can then be edited by clicking in the text box and typing. The column to the right contains options for editing the text, e.g. font, colour and alignment. It can also be edited for mobile viewing. There are also shortcuts available above the text field which can be edited:
Using the 'Merge Tags' Facility
In each heading or text box, there is the 'Merge Tags' facility. This is a useful means of personalising emails with client data, e.g. "Dear Mr Jones".
Click 'Merge Tags' to bring up a dropdown menu. Select from either the 'Contact' or 'Organisation' data list and then select from within that what information you wish to merge into your email.
Adding a Button
Drag the 'Button' icon into the email. The icon can be dragged anywhere in the email. It will be dropped wherever the blue bar with 'Drag it here' appears.
Click on the text within the button in order to edit it. Some shortcuts are available to use within the button (bold, italic, underline and strikethrough) along with the 'Merge Tags' facility.
To edit the button, use the text in the column on the right. A button requires an action to take place once it has been clicked. To set this up, use the section titled 'Action'. There are three actions to choose from: 'Open Website', 'Send Email' or 'Call Phone Number'. Which action you select will determine the fields you are required to fill in.
The colours of the button can also be edited to match your branding.
Copying Features
If there is a feature that you wish to duplicate, such as a text box with all the correct font and colours for your brand, click on the field and click the 'Duplicate' button and this will duplicate that feature of your email. You can then edit the duplicate.
Deleting Features
To delete a feature of your email, click the field within your email to be deleted and click the 'Delete' button.


