1. Open 'Email Marketing' from the CRM and select 'Create Campaign' in order to create a new mailing.
2. Work your way through each of the fields.
- Name - This is the name of your campaign and will not be seen by any recipients; it is just for your own reference.
- Template - Select the template that you have create through 'Email Templates'. Further edits can be made using the 'Edit Template' button which will appear once a template has been selected.
- Subject - This is the subject line that will appear to your recipient. Be concise and clear.
- Campaign Type - For some groups of recipients, GDPR compliance will apply;
- Marketing - A marketing campaign will exclude out any contacts that have opted out of email marketing. This is usually used for promotional emails.
- Transactional - A transactional campaign will include all recipients regardless of their marketing choices and should be used to contact individuals that have a current, active interest in a topic that you are needing to contact them about.
- Sender - You can add as many different senders to your account as you need but they will all need to be email addresses that have the suffix you registered with us, e.g. '@showingscene.com'. This can be done through 'Email Settings' in the CRM.
Recipient Filters
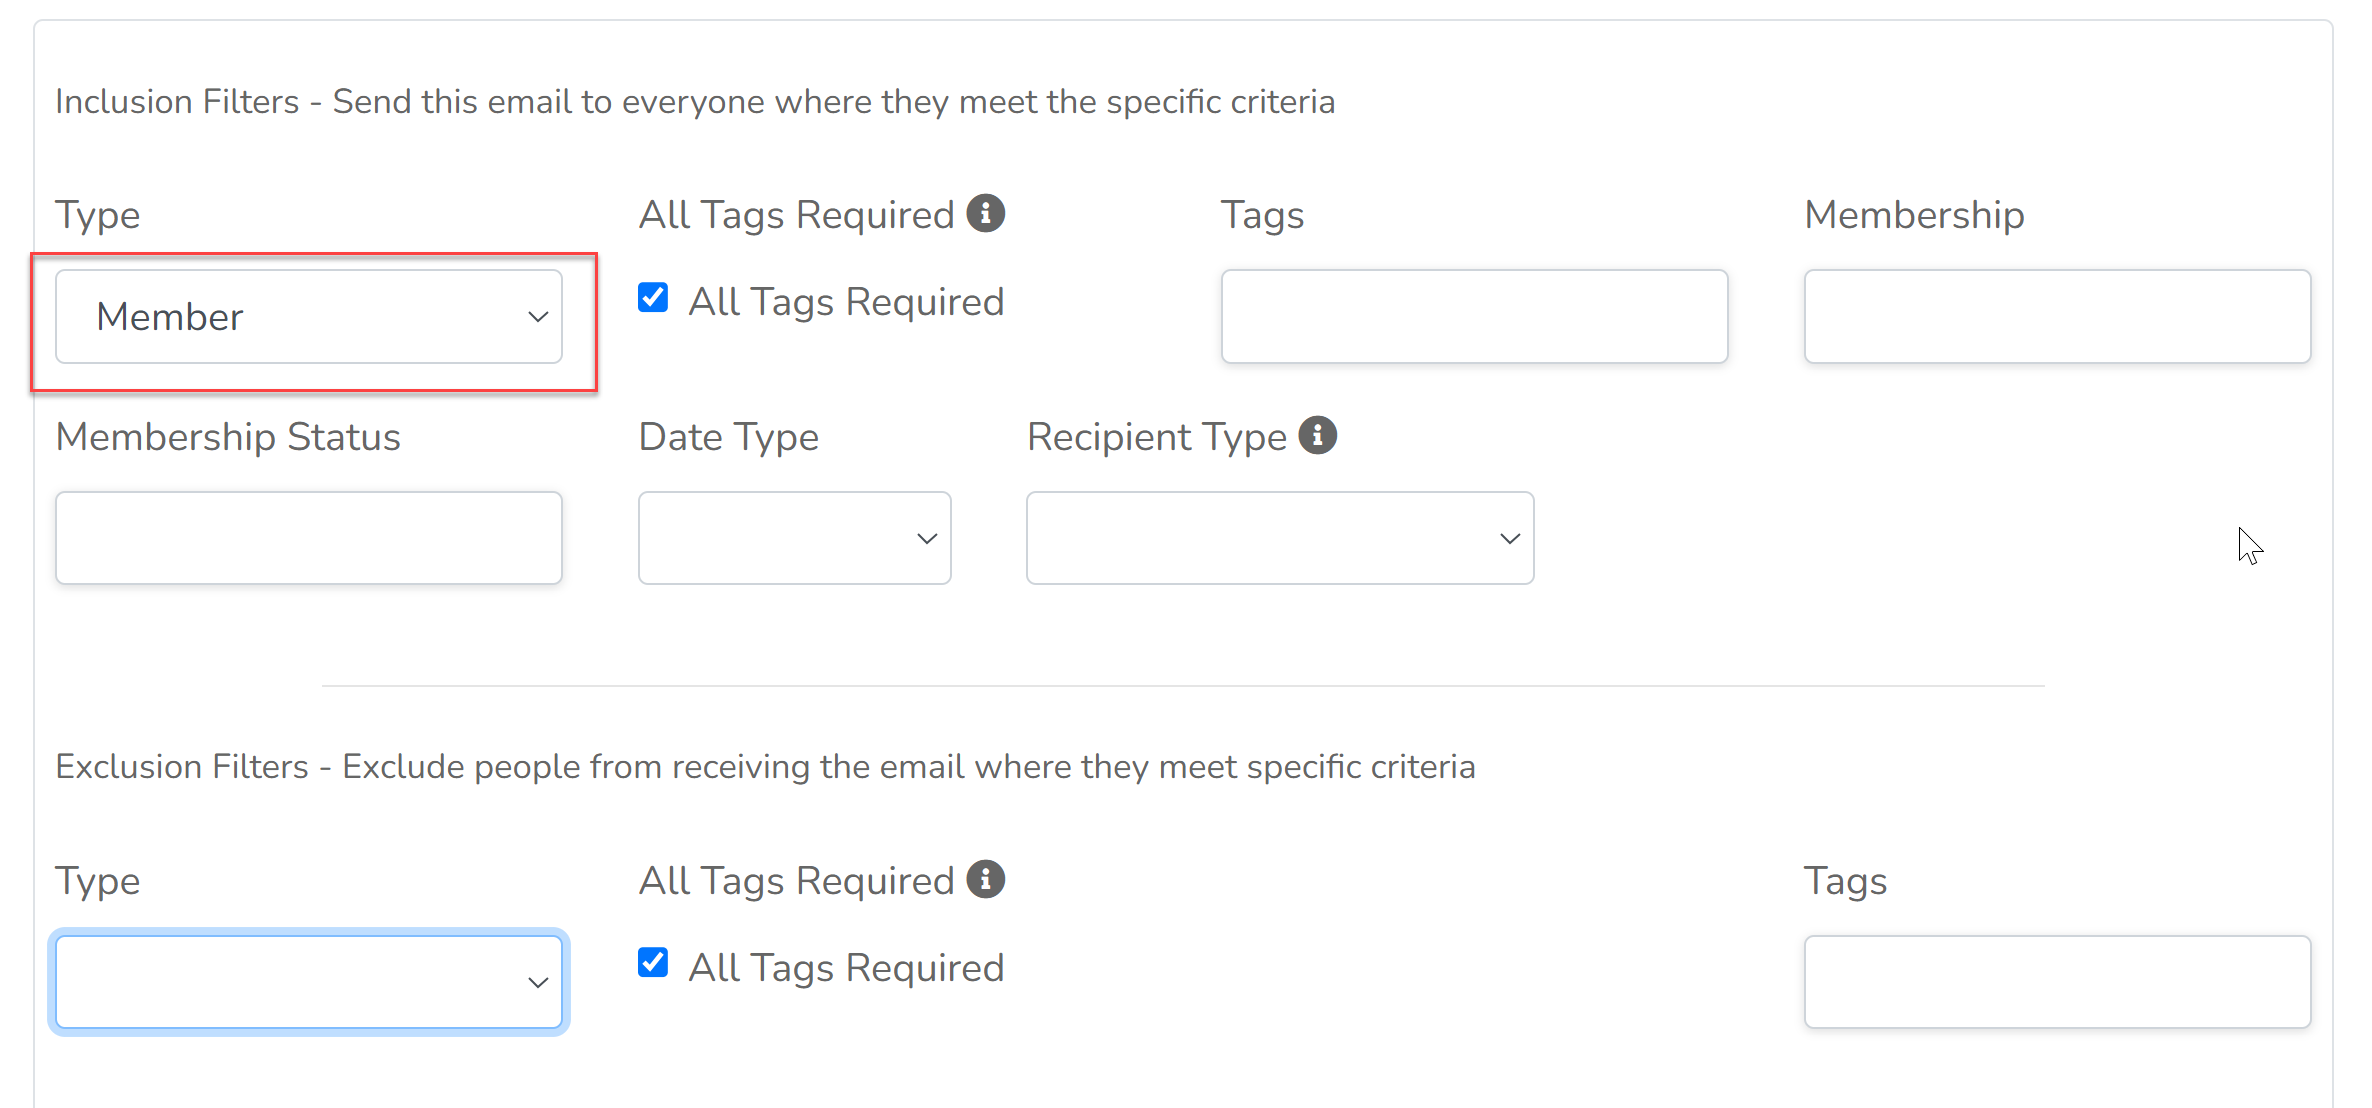
There is the ability to include certain user groups and exclude others. You do not have to fill in all of the fields but there must be something included in the inclusion filter 'Type'.
For example, to sent an email to all of your members, select Type 'Member' but leave the other fields blank:
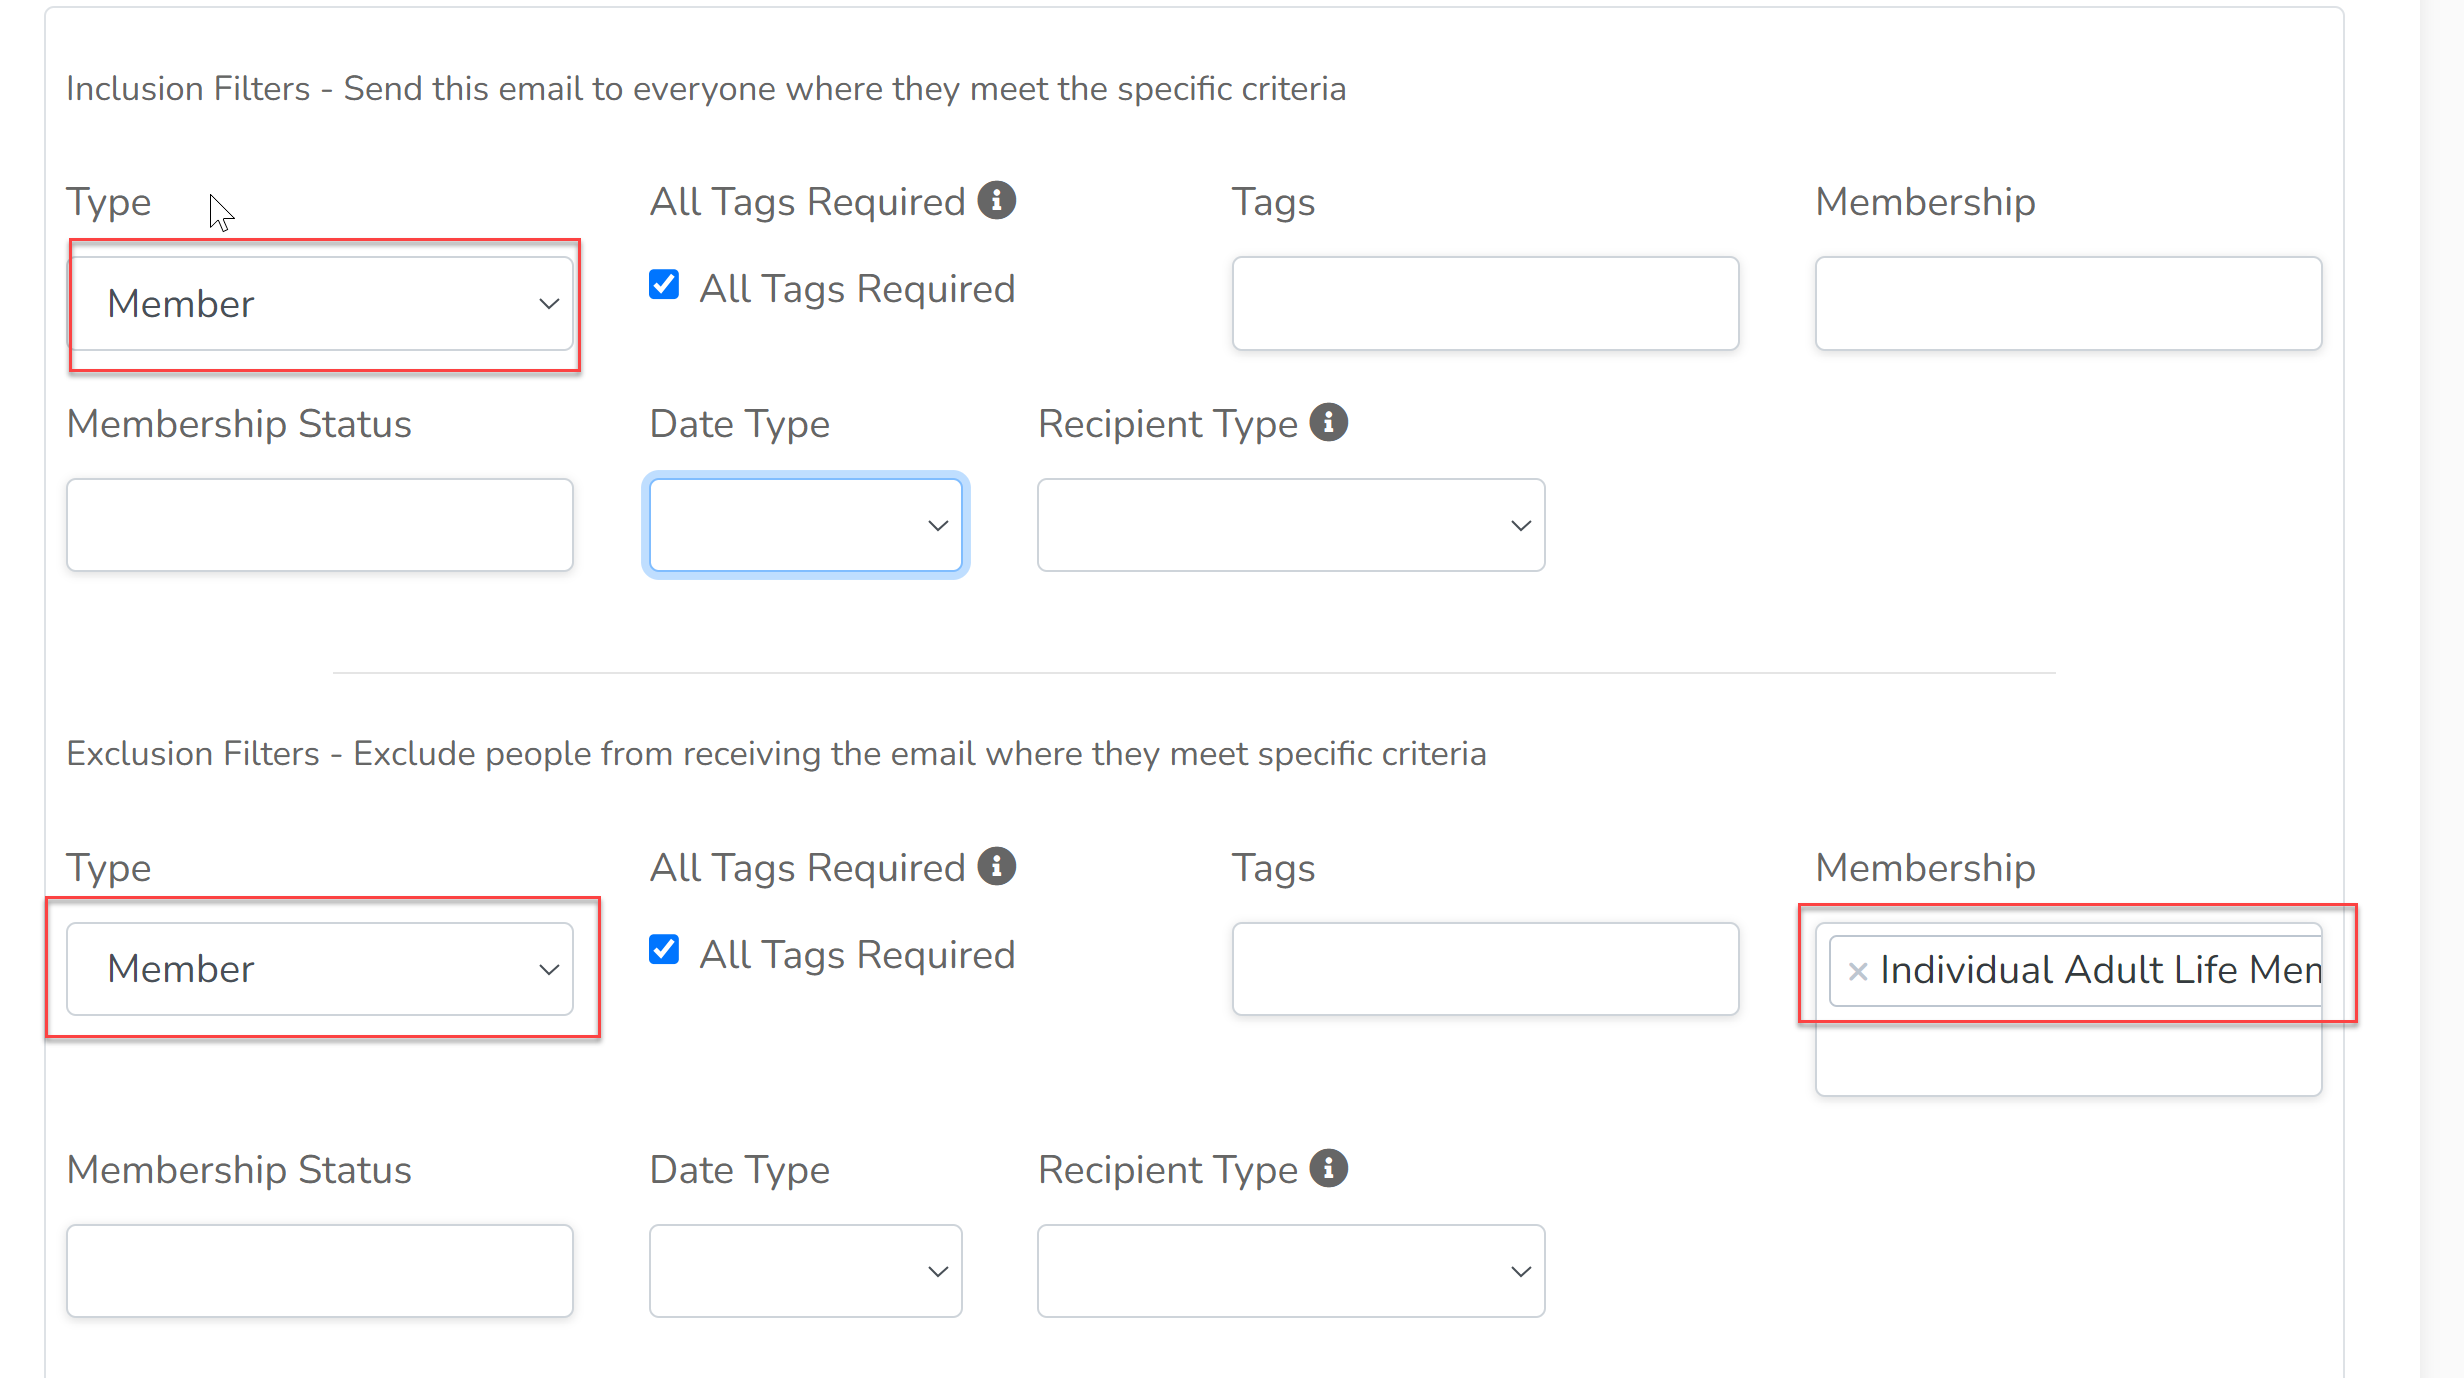
To send out an email to all your members, but not the life members, select 'Member' in the inclusion filter, but in the exclusion filter, select 'Member' as the type but select the life membership product in 'Membership':
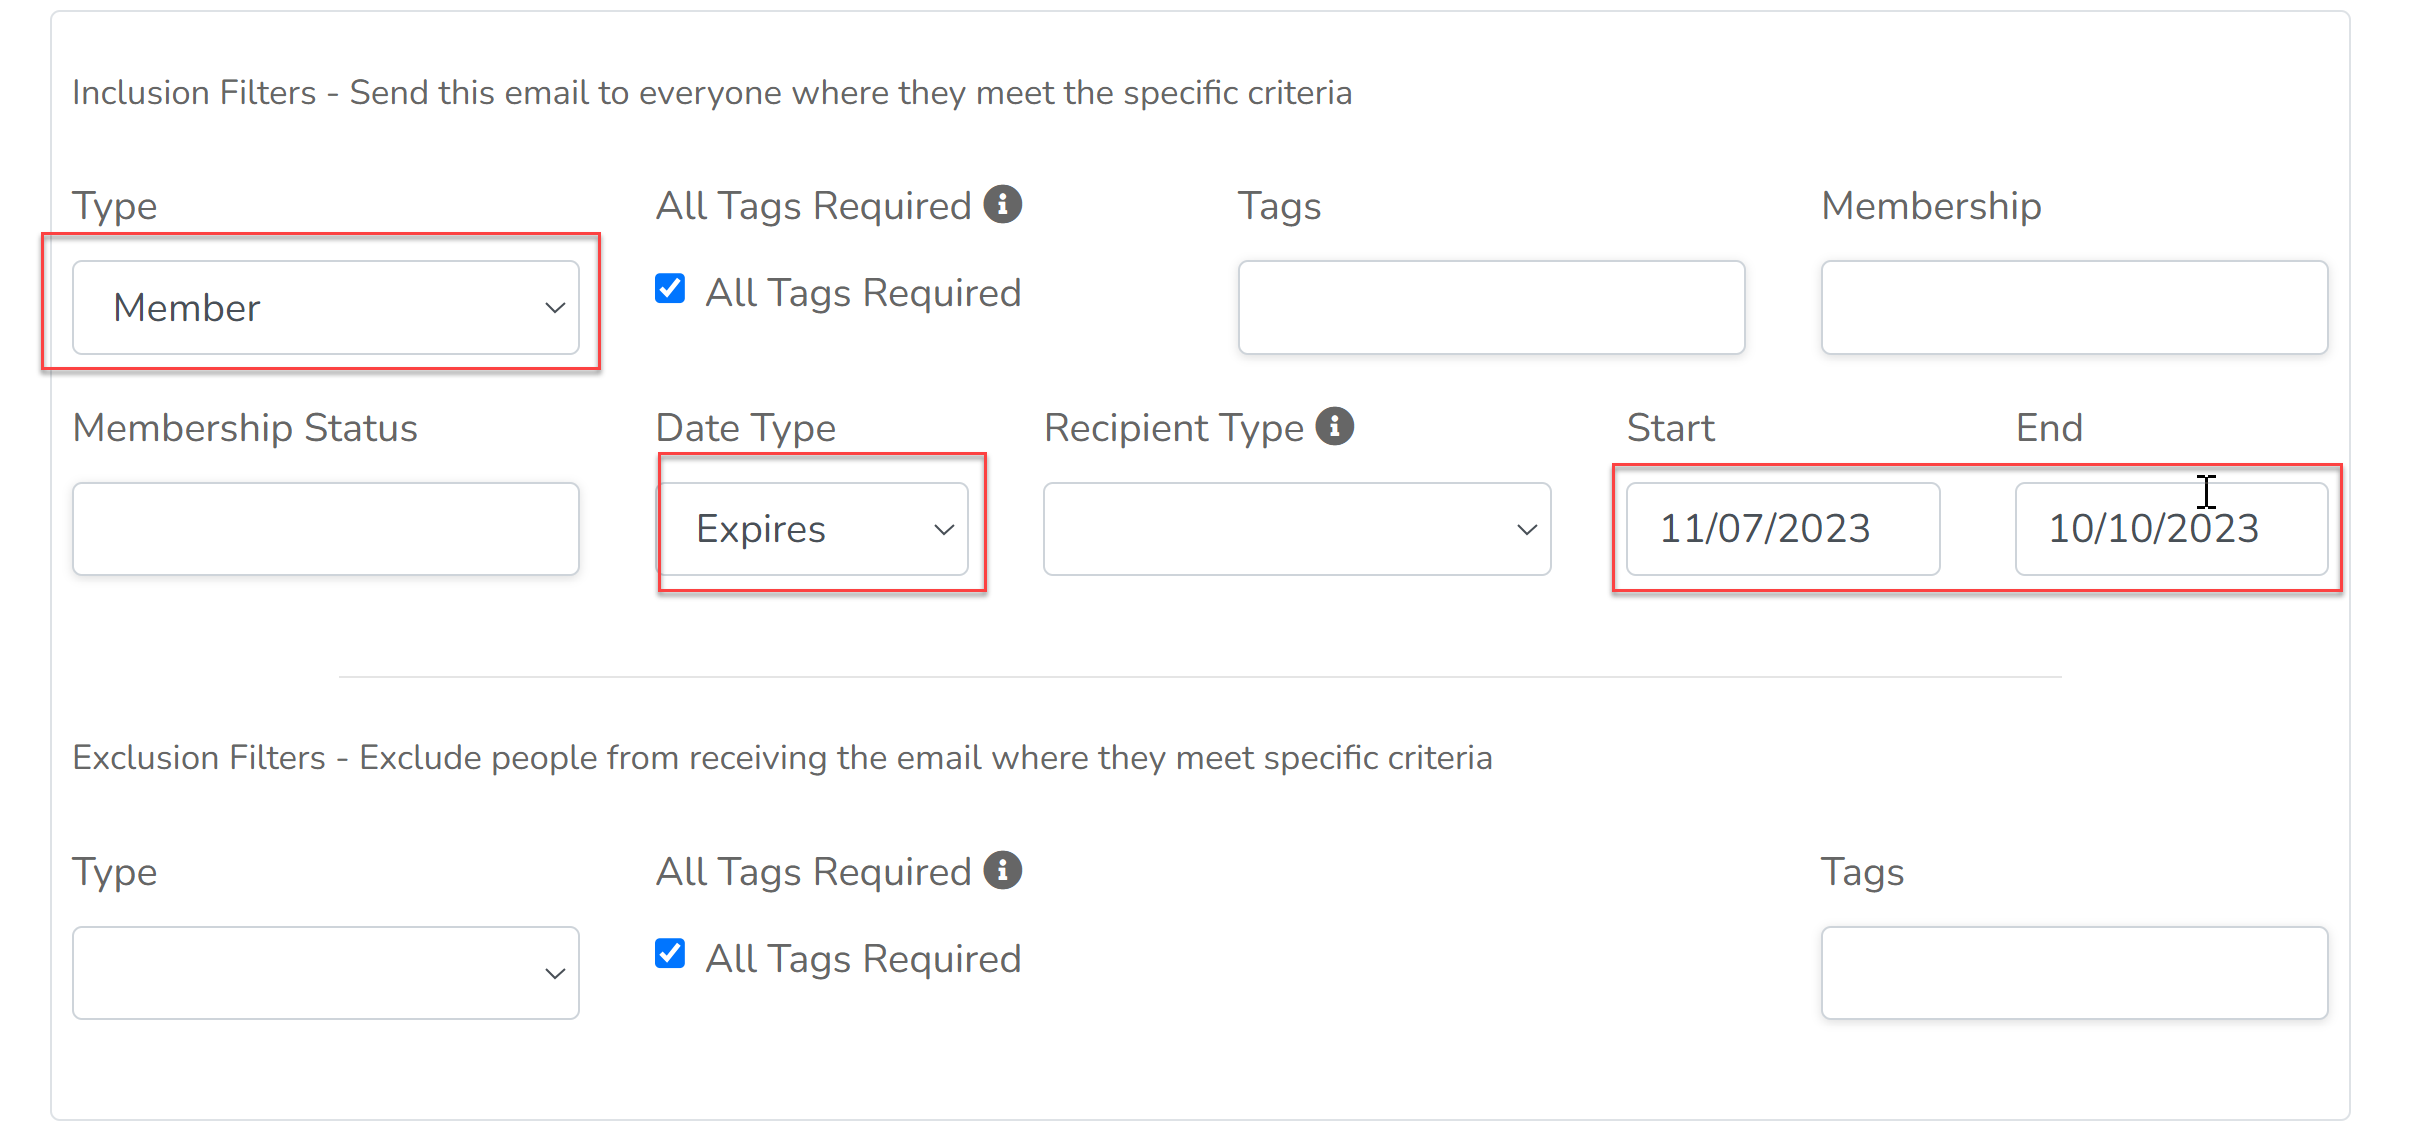
To target the campaign to all the members who were set to have their membership expire within the next three months, set the inclusion type to 'Member' and within Date Type, select 'Expires' and then include the required dates:
These are just three examples, but the tool is very powerful in making your email campaigns highly targeted to particular user groups.
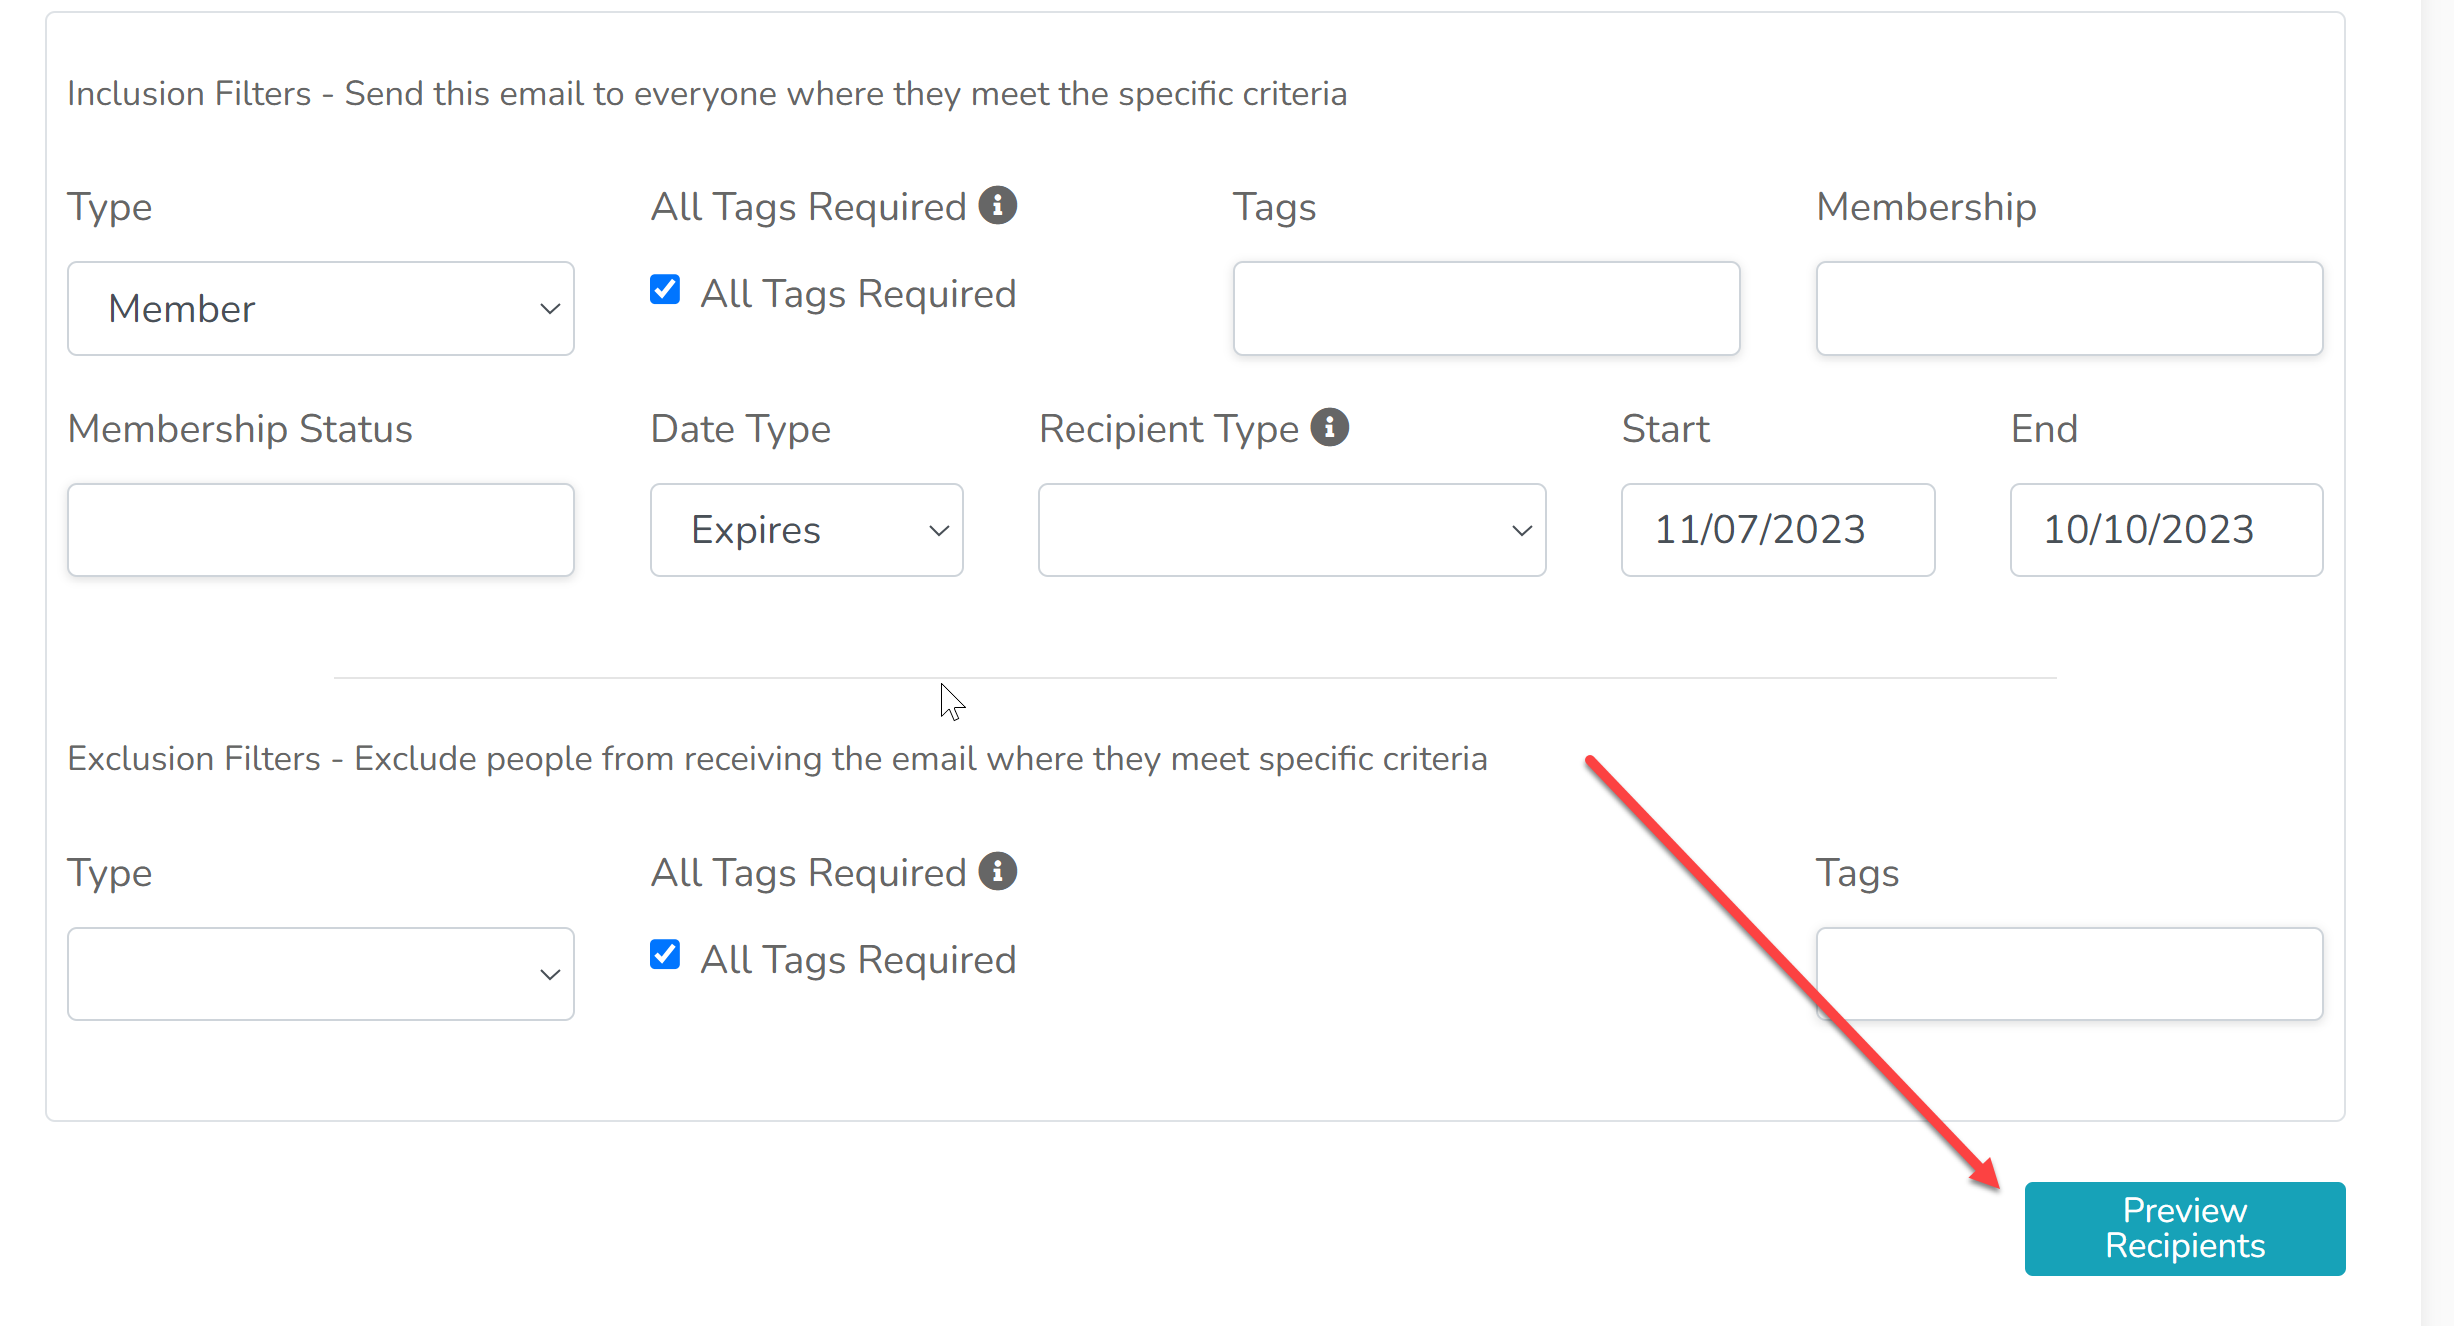
3. Once you believe that you have set your filters correctly, make sure you use the 'Preview Recipients' button to check that the number of recipients is as you'd expect - this is a useful indicator as to whether you've set your filters up correctly.
Remember, postal entries (traders, sponsors, exhibitors or members) may not have an email address and will therefore not be included in your total.
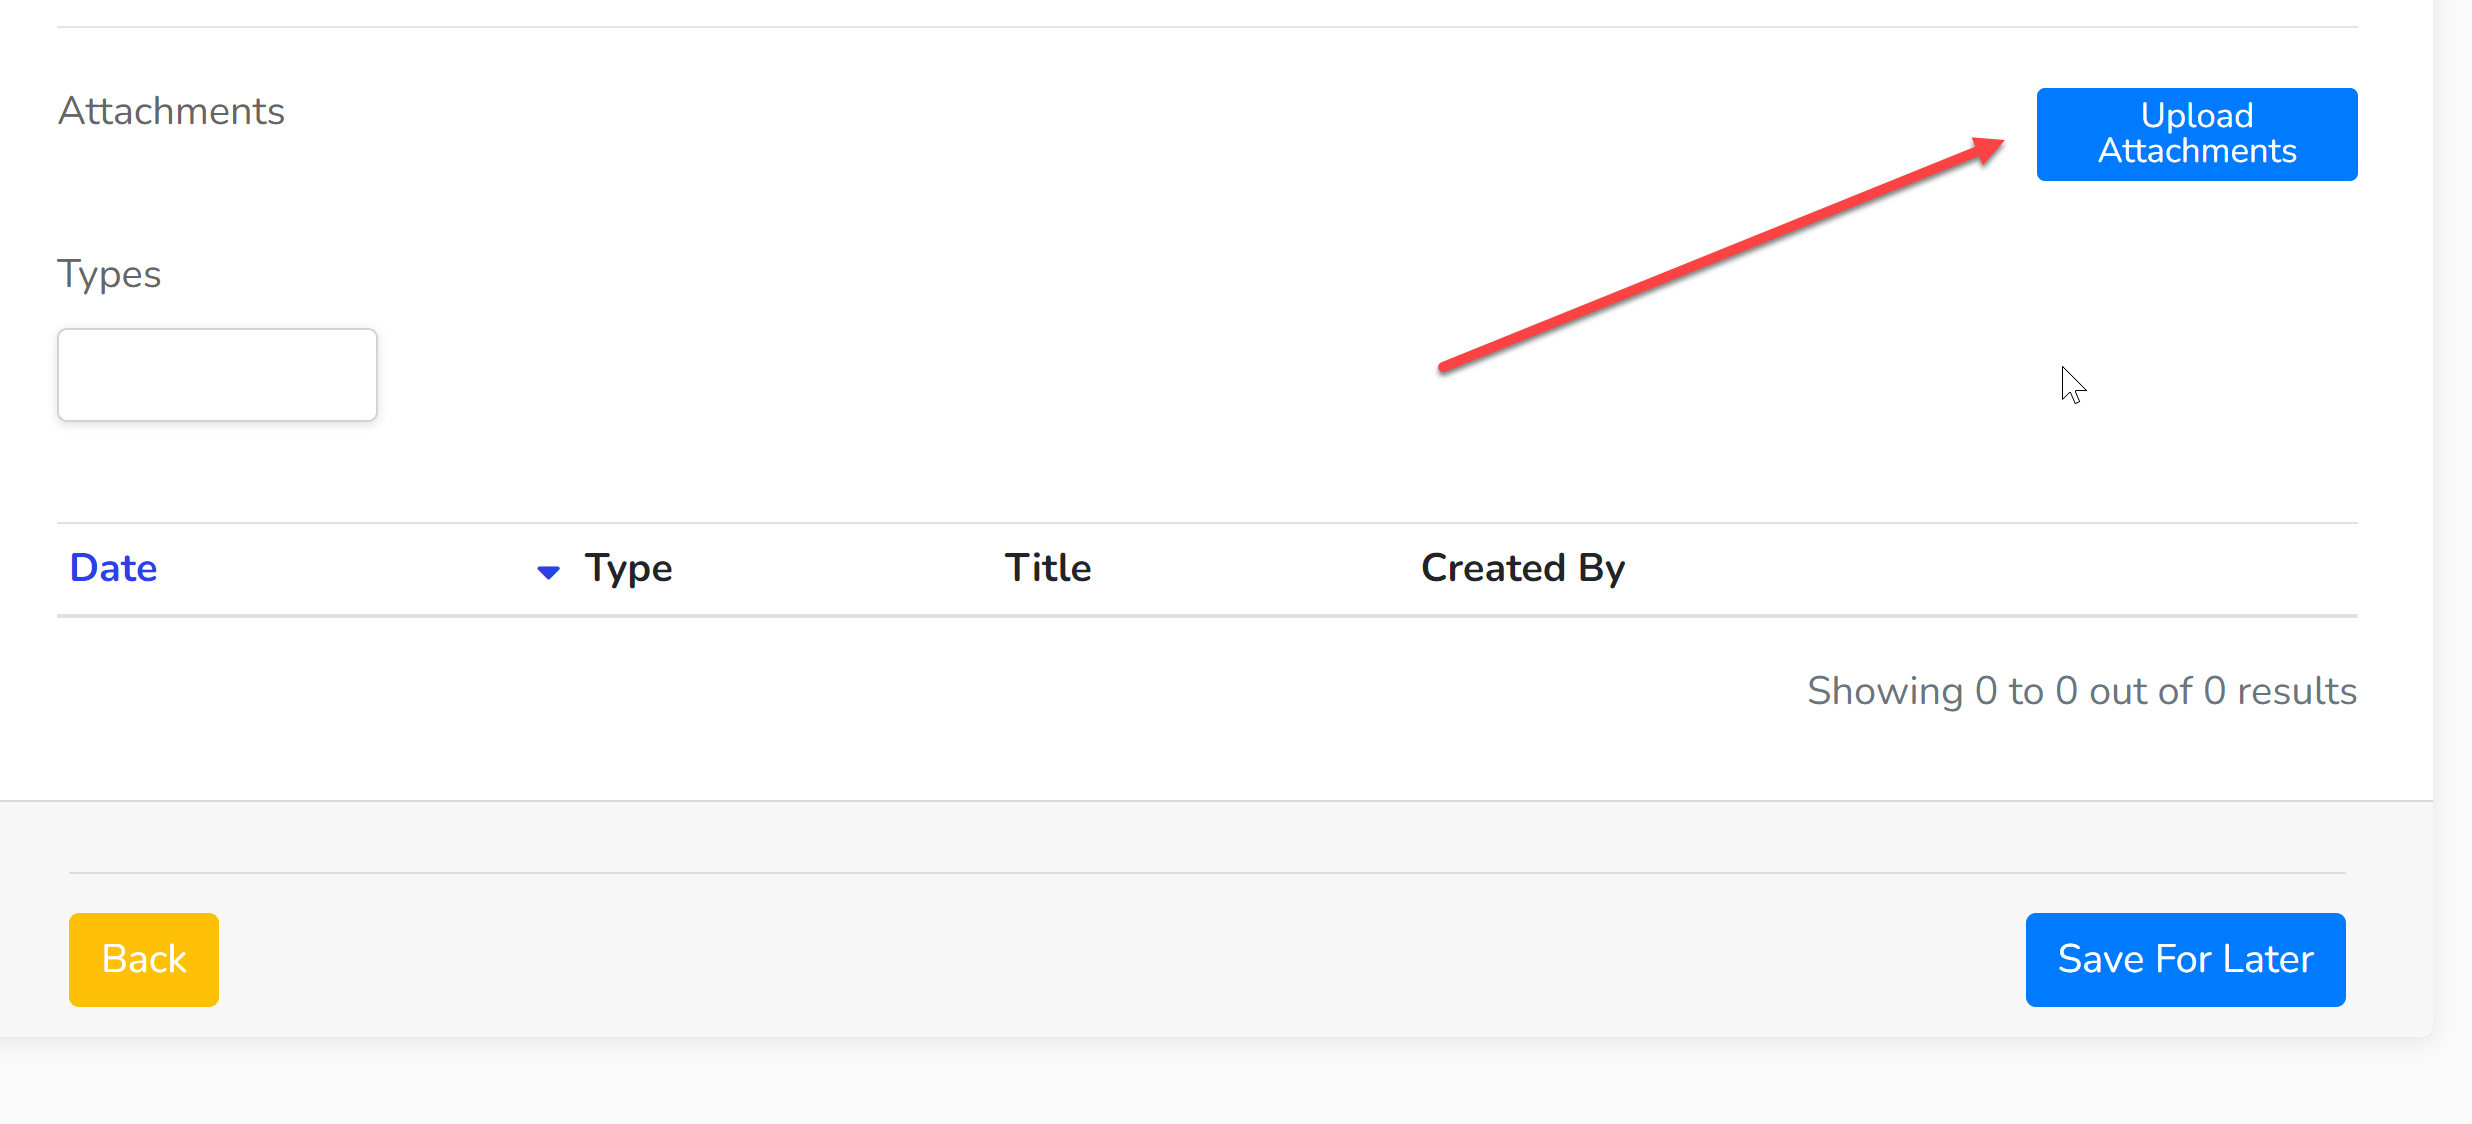
4. If you wish to upload an attachment(s) to your email campaign, this can be done by clicking 'Upload Attachments' and selecting the file(s) to be attached. Once uploaded, they will appear in a list at the bottom of the page.
5. Click 'Save for Later'. When you first create your campaign, this is your only saving option as it reduces the risk of an email being sent in error. When you reopen your campaign, you will be given the option to test the campaign by sending it to yourself, scheduling it to send at a set time in the future, send it now or save it to send later.
Statistics
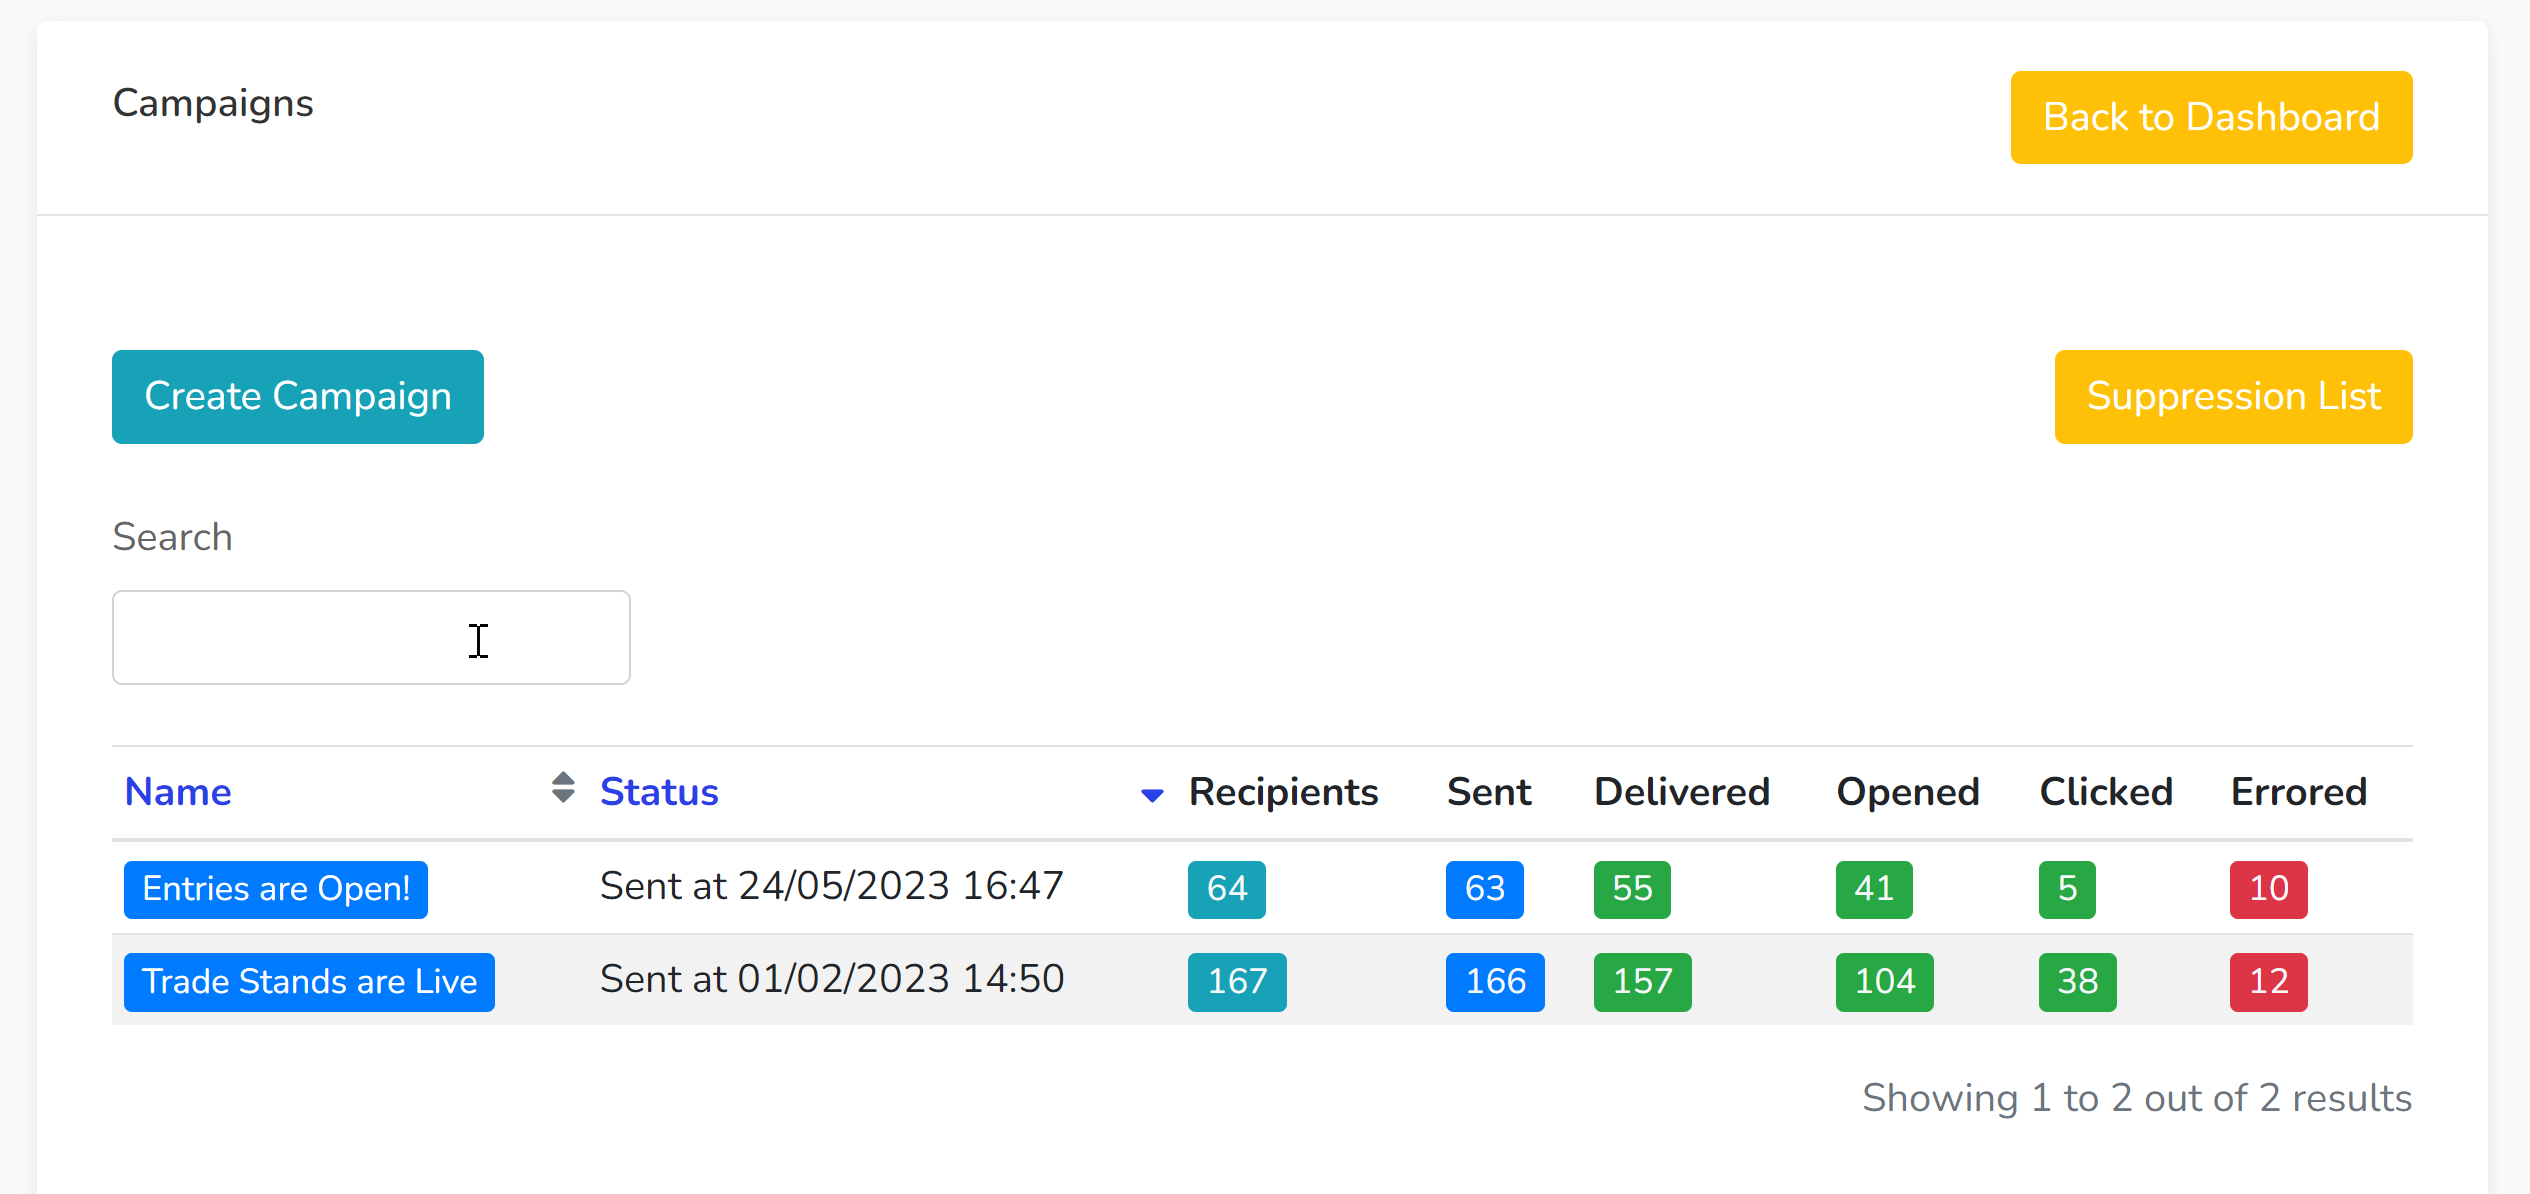
Once your email campaign has been sent, you'll start to receive some statistics about it which will look like the following:
- Recipients - This is the total number of recipients that the email was sent to.
- Sent - This is the number of successfully sent emails.
- Delivered - This is the number of emails that have reported back as being delivered.
- Opened - This is the number of emails that have been reported back as being opened.
- Clicked - This is the number of emails that have been reported back as having had a link clicked.
- Errored - This is the number of error reports that have been received.
Each one of these buttons can be clicked to see the relevant name, email address and the time of an action (e.g. the time it was opened). Error reports will also detail the error.
These reports are only as accurate as the information that has been fed back to us by their email providers.
All email communications are also logged in each individual contact's file in the CRM along with the date of delivery.

